Thursday, October 30, 2014

Christmas Banner in A Mason Jar Gift

Recently I jumped at the chance to do a Mason Jar gift.

I am a long time admirer of Angie from The Country Chic Cottage  and she wanted to do a round up.

I have a passion for mason jars and pick them up every chance I get so I figured this would be easy.

But then I did the typical me thing....

I come up with half a dozen ideas for Mason jar gifts and could not decide on one.

So I am showing you one today and I plan to share one every Monday from now until Christmas in a feature I will call Mason Jar Monday.

Here is today's Jar gift.


A Christmas banner in a jar.

The jar is not the star of the show this time.

The banner is.


It is fast and easy to make.

The perfect gift to make in multiples.

Gather some supplies:


I used an old hymn book from a book sale


scissors

a stapler

scrap red paper

some green twine

buttons

and a Sharpie marker.

Remove pages from the hymn book and trim the edges.


I cut my pages into roughly fourths.


Then I clipped a triangle out of the bottom of each piece.


I did spend some time in the studio searching for a fast easy way to do letters.

Of course the search took longer than it would have to just get started.

So I decided to just use a marker and do them free hand.

That is more fun anyway.

I used a large flower punch to punch out a few red flowers.


I folded the top of each piece of paper over and stapled it onto some green jute twine.

I stapled the red flowers between the letters and glued a button over the staple.


I spelled Merry Christmas, but you could do any word or phrase you want.


To make the rosette, remove three more pages from the hymn book.

Use the Stampin' Up Simply Scored board to score the paper about every half inch.


Accordian fold the pages.


Fold the pages in half and glue three of them together.


Add another red punched flower to the front and top with a button.


Pile your banner pieces up and stack them so you can slide them in your mason jar.


I used a wide moth quart jar.

I also added two glittered clothespins to hang the banners.


Then I wrapped the lid with more twine.


Glue your rosette to the lid.


If you would like the recipient to be able to use the rosette as a decoration or ornament, do not glue it on.

Instead use sticky dots so it can be removed later.


It would be a special gift to make a family's name and the date they got married or moved into a new house.


You could make sweet first name banners for a child's room or a new baby.


But I made a Christmas banner for this one.


And because I did not have anyplace in my house ready for a christmas banner, I displayed it in the garden.


I love this little woodland vignette outside my shed.

The large piece of slate was from a school house.

It was given to me by a friend of my husband.


The concrete mushroom and planter I made several summers ago.

The tree mushrooms were cut by my husband when a tree blew down in the yard last summer.


Hope you enjoyed my little Mason Jar gift.

Thanks for stopping by...


Sunday, October 26, 2014

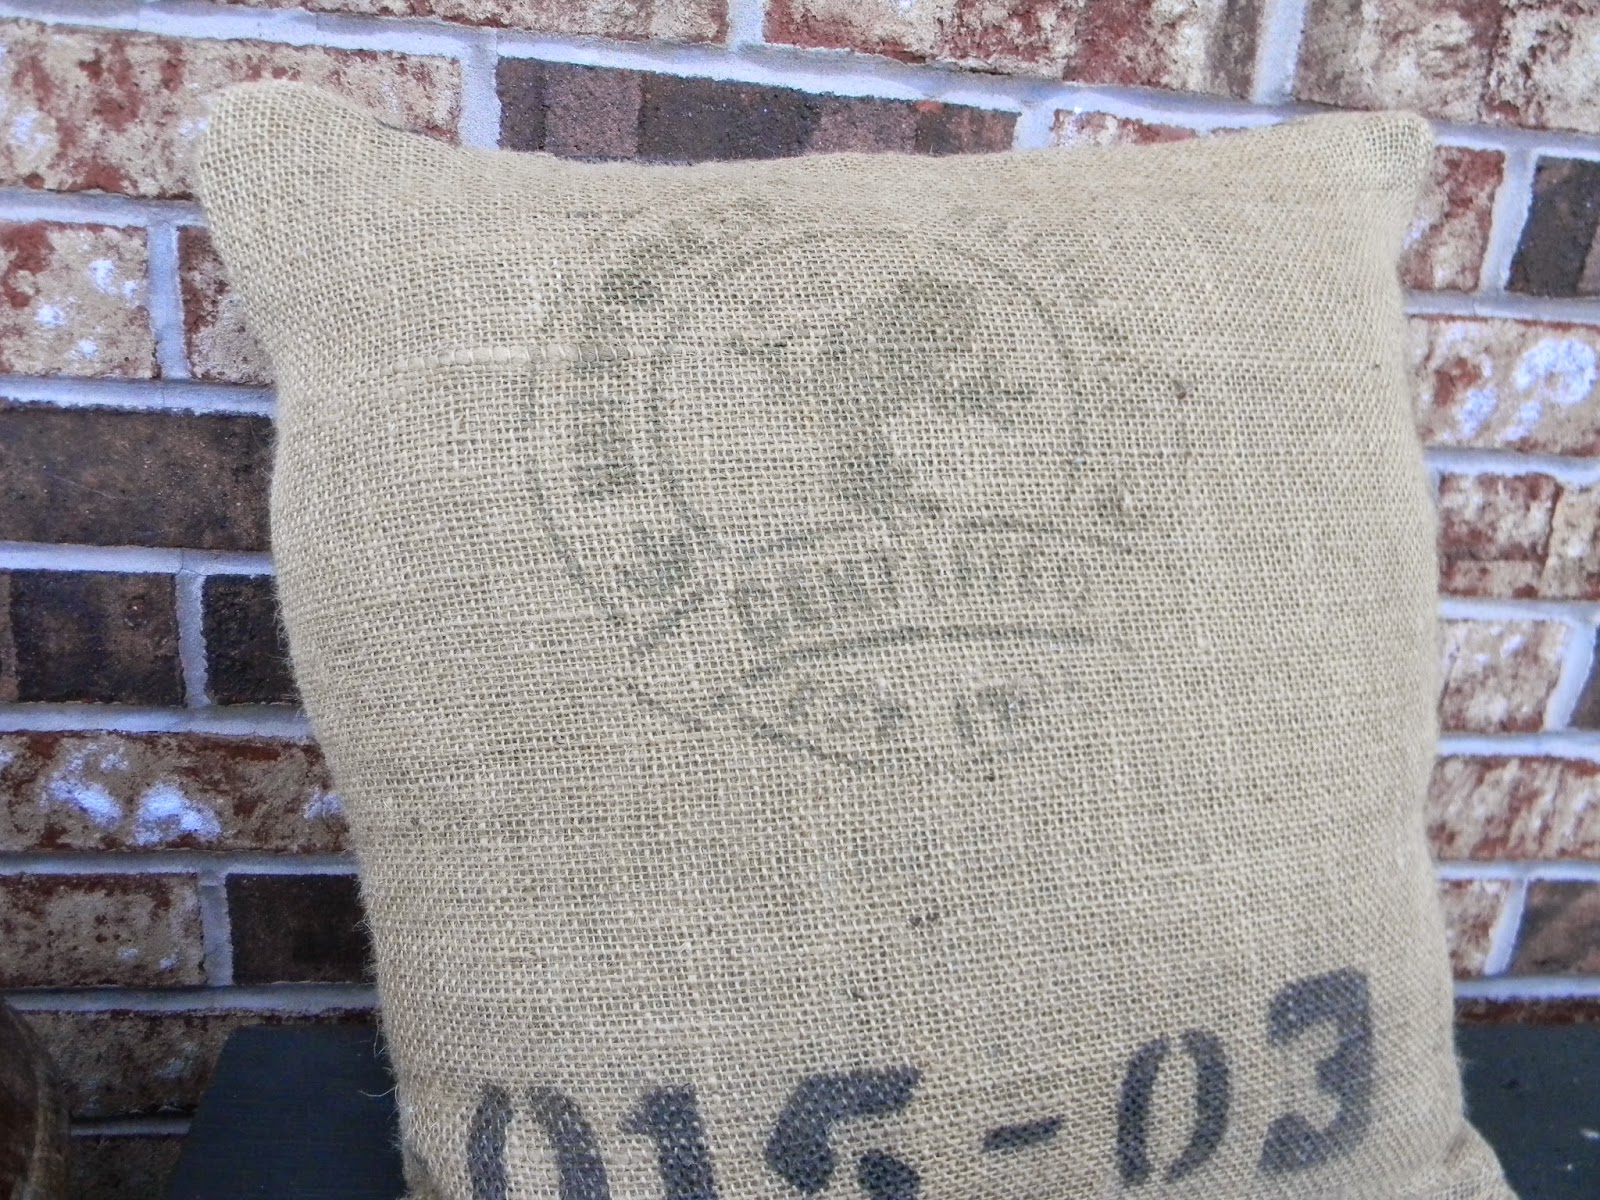
Burlap Pillow Cover from A Coffee Sack...


Having a daughter that is a barista has multiple benefits...

She can make really great drinks at home.

Sometimes she brings me amazing leftover coffee....

And she brings me coffee bags...

I love those burlap sacks.

So this summer I used one to make a pillow cover for a bench outside the garage.


This one has that great frog graphic.

I cut my pieces from the burlap bag to maximize the bag graphics.


This is my first pillow cover and I was determined to do it without a pattern.

This can be very rewarding or very frustrating... 

This time it was good.

Here is the back of the pillow


It looks great on the bench.


I am proud of my first effort and have plans for a few more.


I like that little twine tail that I left intact from the bag...

I took this picture about 2 months after I put it outside.

You can see the frog really faded.

I like the look but learned to try something to preserve it in the future if it will be in the direct sun...


Thanks for stopping by...

Saturday, October 25, 2014

A Spooky Doorside Vignette

We have a party coming up soon.

I decided to pull together some of my recent projects to create a spooky vignette outside our door.


You might recognize some of the elements.


The hydrangeas came from my parents this summer and appeared on my workbench one Wednesday.


The Spider Spells book is a favorite and will end up a variety of places throughout the years I am sure. 

 When I have time, I will make additional volumes as well.


Here is one of the Candy Corn Gltter jars with the rice light strand inside....


The spooky branch was actually a paracord display my husband made for my daughter's paracord bracelets.

I repurposed it by adding stained cheese cloth webs.


When I was making glittered candy corn jars, I made a bottle brush tree as well.


The spooky spiders add a nice little touch...


I can't wait to see if anyone at the party notices...


The battery operated candles are a nice safe touch for any where.


I love vignettes that are spooky but fun.


Makes me want to sit in the rocker and enjoy the crisp fall air...


After I had done most of my photos, my mercury glass votives were finally dry so I added them as well.


Happy Haunting.

Thanks for stopping by....

Linking up with these great blogs...

Friday, October 24, 2014

Mercury Glass Pumpkin Tealights


I have been wanting to try making my own mercury glass.

I had a couple Halloween ideas in mind for them.

I got a can of  Looking Glass paint from Krylon.

I gathered my supplies:

clear glass jars from the thrift shop

painter's tape

 scissors

Krylon Looking Glass Paint

water bottle

paper towels


I cut shapes from the painter's tape for my pumpkin face and adhered them to the inside of the jar.


This little guy has feet.

Cute!


Gather your supplies...


Spray the inside of the jars with a light mist of water.


Then spray a light coat of the Krylon Looking Glass paint.


The hard part is waiting 5-10 minutes.

Then blot the water from the inside with the paper towel.

Now spray with a mist of water again and then another coat of paint.


Repeat to achieve the look you want.

Wait and blot the water each time.


If you get unwanted runs, you can rub or wipe them of with the paper towel.


You can see it is beginning to look more opaque.


I did a couple without the pumpkin face as well so I can use them year round.

I wanted a more opaque look on some of those, so I turned some of them upside down and repeated the process on the outside of the glass as well.


Once they were dry, I added tealights to them and tucked them into my fall vignette on the porch.  

You will be seeing more of that soon.


It is hard to photograph them well with the lights inside but the faces do show up nicely.


They add a fun touch to the porch.


I also painted a glass candlestick the same  to use as a base...


What fun!

 Now I am hooked on the Krylon Looking Glass paint and will be hunting for new things to try this on.

Thanks for stopping by...

Linking up with these great blogs...