Showing posts with label up cycled. Show all posts

Friday, June 19, 2015

Feeling Puzzled Earrings

Today is just a quick share of some earrings my daughter makes.

She uses puzzle pieces and wraps them with wire.

Simple and fun.


Each puzzle design lends a different look to the earrings.  

These are more sophisticated due to the subdued colors and design.


Thanks for stopping by.


Thursday, June 4, 2015

Fun Finds for Future Designs


Summer is coming.

It is one of my favorite times of year...

Like a kid, each day stretches ahead of me, open and filled with possibility.

On a recent trip to the surplus store I picked up some fun finds.

These little light bulbs came in many shapes and sizes and beg to be used in some jewelry designs.


Currently I was saving the tiny bulbs from our landscape lights and such as they burn out but these are great shapes and very reasonable.


As lightbulbs go, I think they are not the best quality so I am not upset to use them in fun designs.


 and my other fun find was these drawer pulls.

Yep, it is a mouse.  

I am not sure yet how he will be used, but he will definitely be used.


Thanks for stopping by....


Saturday, February 7, 2015

A Review...DecoArt Chalky Finish Paints...


This post was originally slated for this summer but never made it out of the draft folder.

I love these paints though and wanted to share the post with you today.

I am a DecoArt Helping Artist.


I have used DecoArt paints for about 20 years.


I have always thought they were the best quality, consistency, and pigment at a reasonable price.


This summer I ordered some of the Chalky Finish paints to try them out.


My experience prior to that with chalky finish paints were with those I mixed myself.

And while I love my homemade chalk paints, this was different.

These are so creamy.

I ended up painting everything on my workbench that could use a little paint.

These hat boxes have been in every craft room I had for the last 20 years.

This summer when I was cleaning the studio, I almost got rid of them because I was tired of the floral design.

I brushed 2 coats of Chalky Finish paints on them and now I am in love with them again.


Even the first coat has great coverage.


Now my buttons have a happy new place to hang out.


And I like that you can still see the old pattern inside.

I painted  them in different colors.


While I was waiting for each coat to dry, I looked around the workbench and saw the pretzel container of bottle brush trees.

Usually I just turn the label to the back so I can't see it, but there was still paint on the paint brush, so I gave the label a few coats.


Then I did my other one too...

Hmmmm...

How about those little peat pots...

 I showed you how they turned out, but here is where they got started...


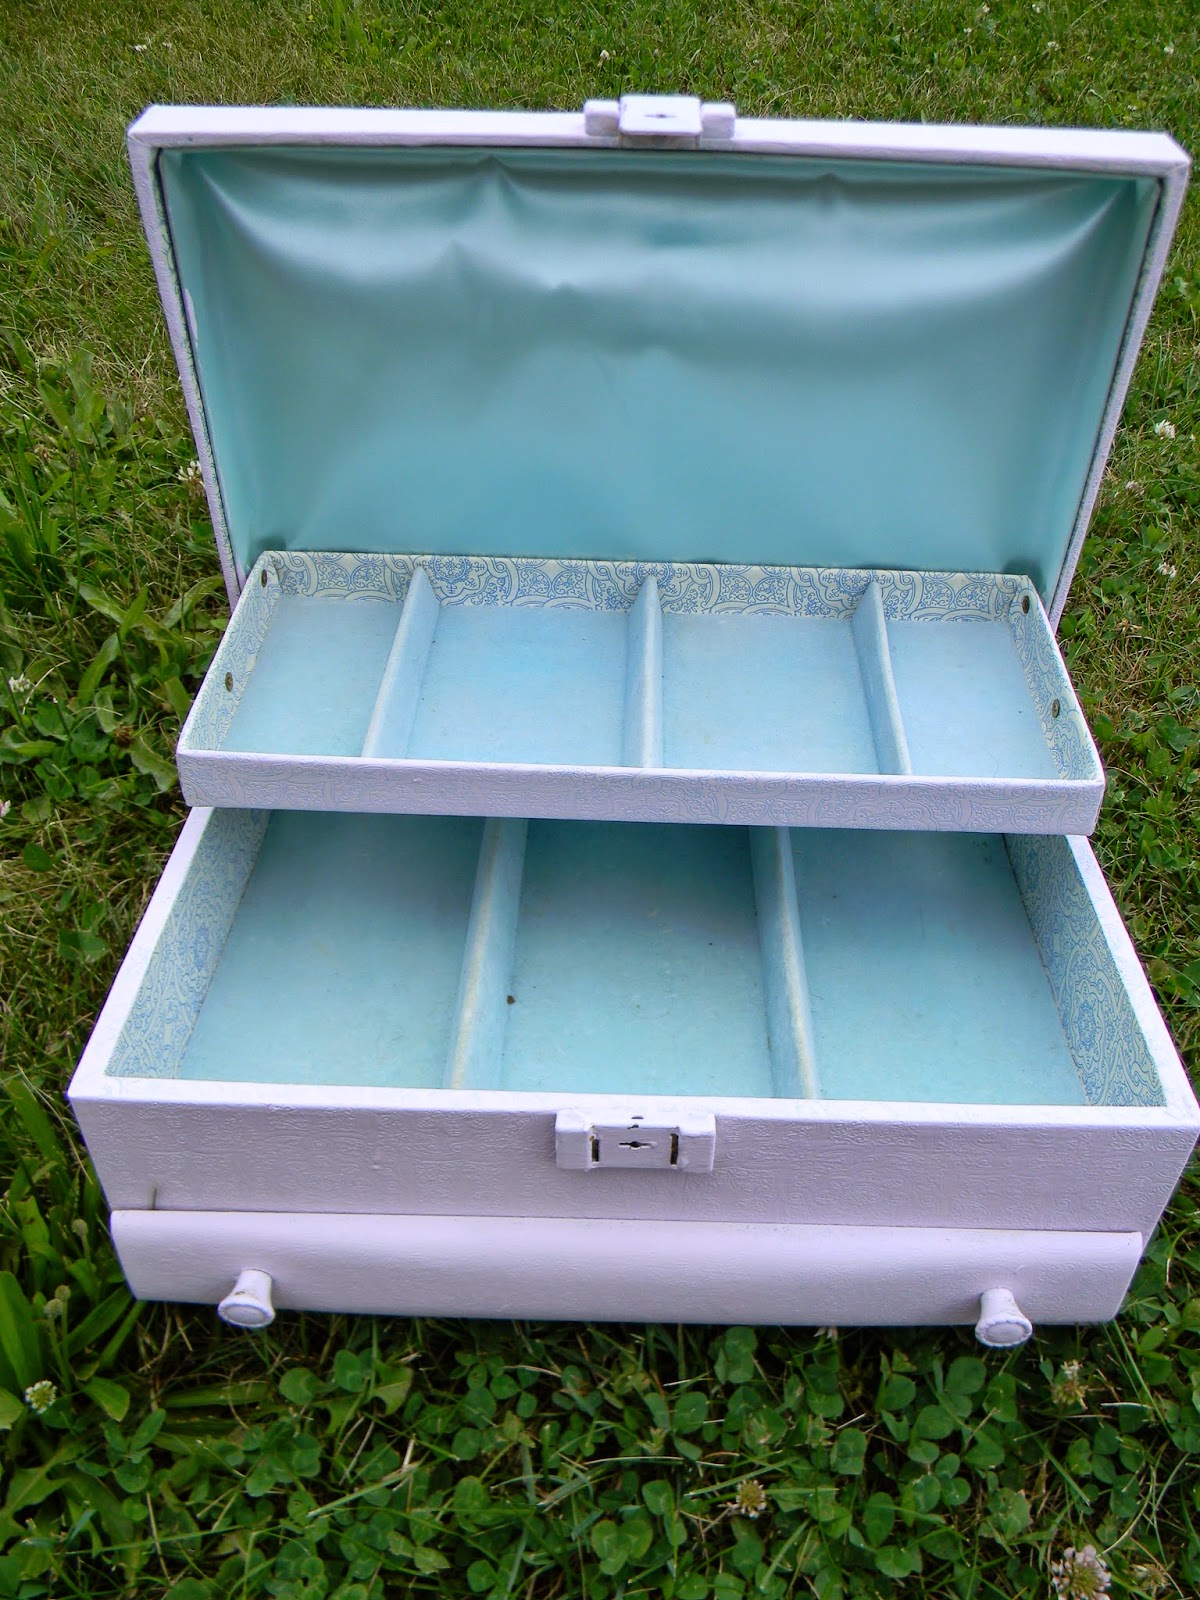
This jewelry box was originally headed for the thrift store.

I bought several jewelry boxes full of jewelry this summer at my favorite flea market.


While my brush was still loaded with paint, I decided to give it a chalky makeover.


I love the new pale chalky pink.


I left the inside with the original colors and pattern.


With it's new chlky finish, it is cute enough to be a keeper...


I strongly recommend these paint if you have not tried them yet.

They have a great consistency, super coverage and a great array of colors.

Thanks for stopping by...

Thursday, December 18, 2014

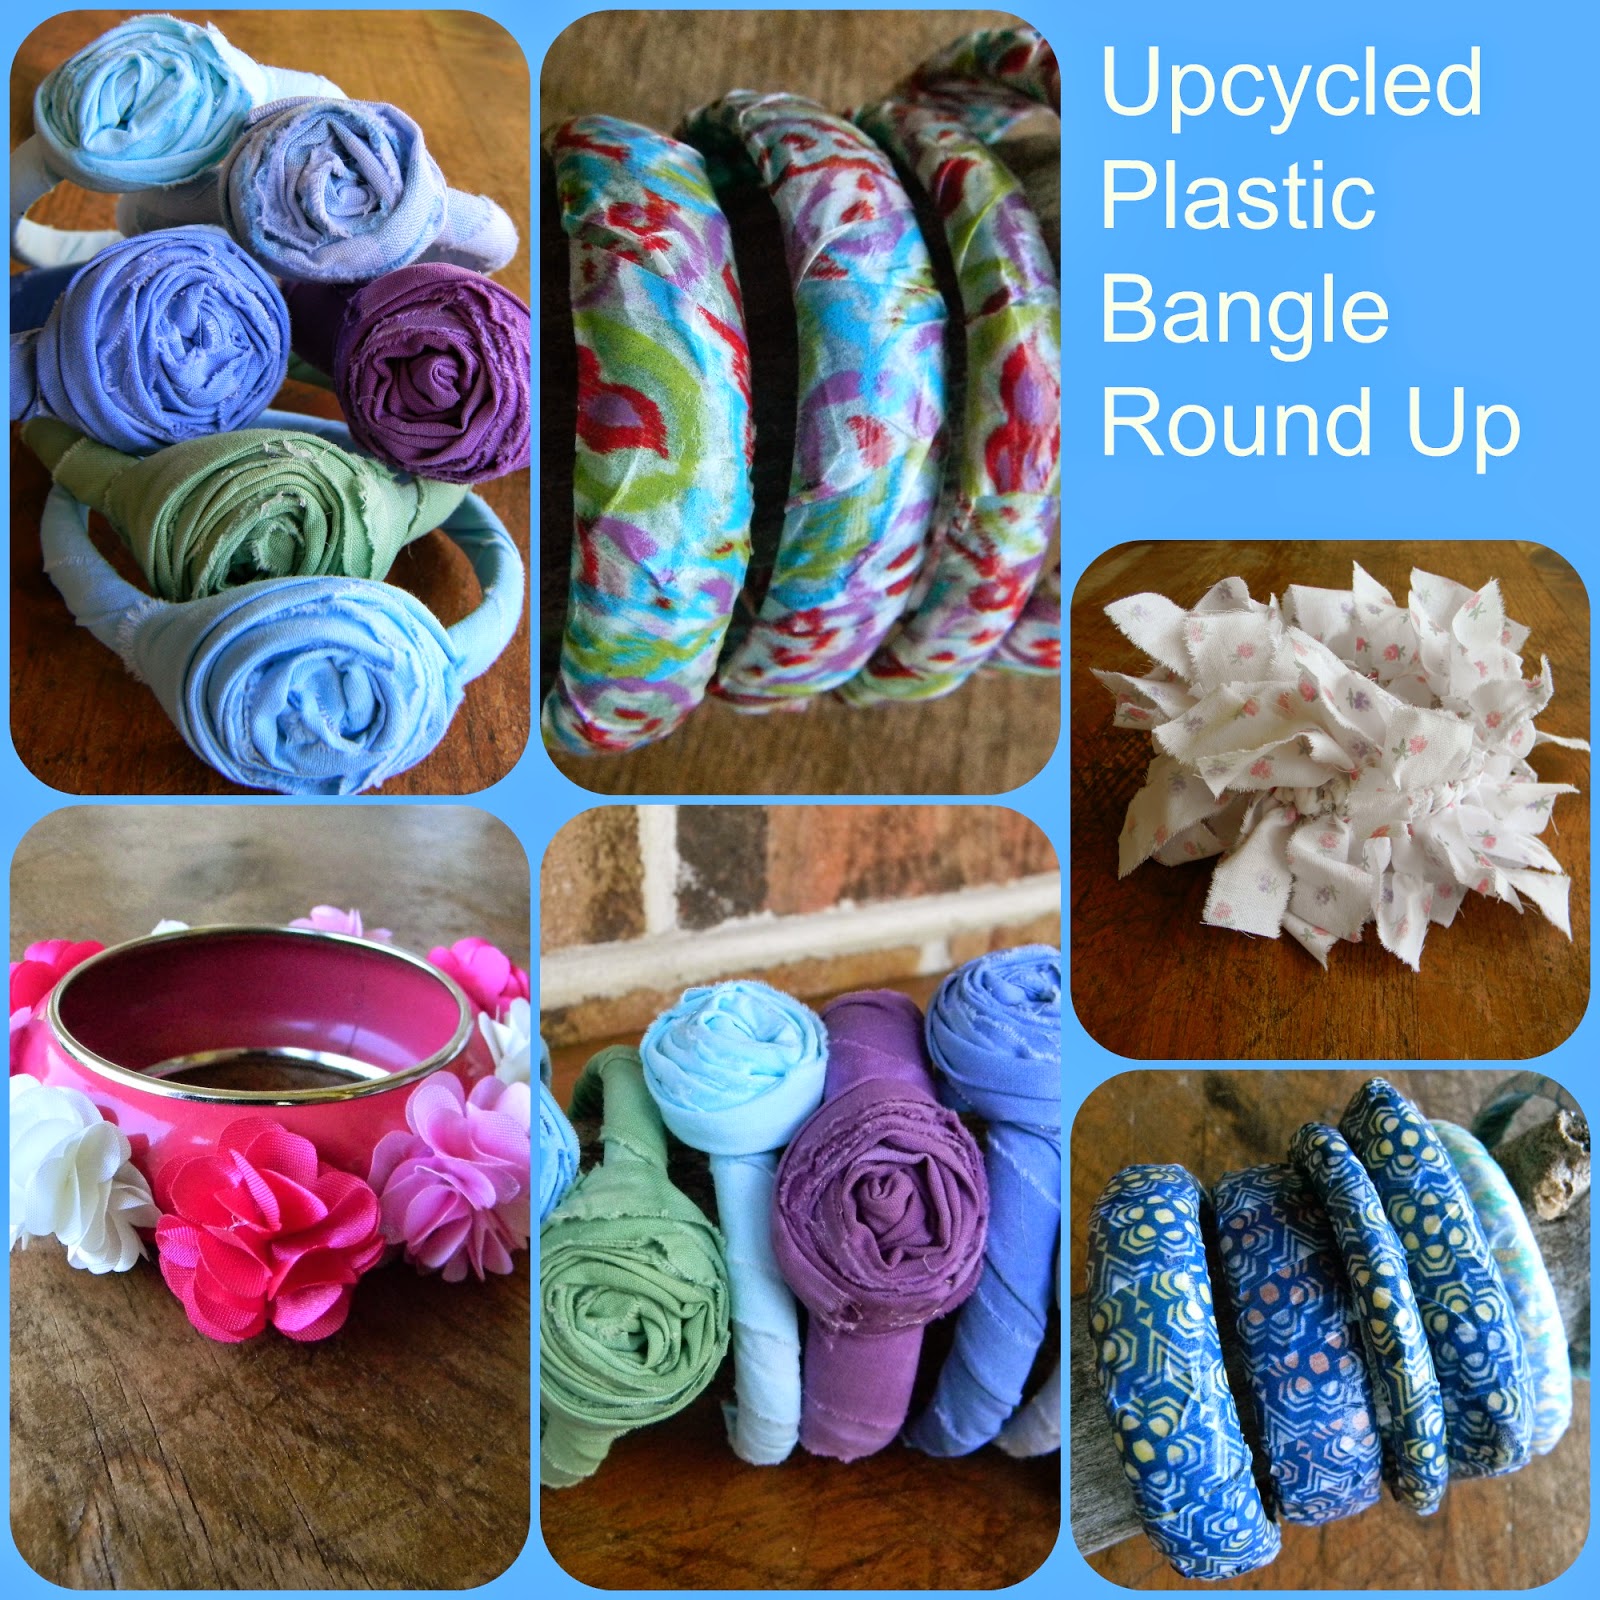
Bracelet Makeover Round Up


Christmas is right around the corner.

If there are a few gals on your list that you have not finished shopping for, try a few of these quick and easy bracelet up cycles.


For most of these, I started with plastic bangles.

A couple used metal bangles but you can use whatever you have on hand or pick up.


These pretty bangles are just updated with some vintage buttons.

You can find the directions here.


These are essentially the same but I used cheap earrings and removed the posts.


This fun shabby chic cuff uses recycled sheets and takes longer to locate the sheet and tear strips than it does to make the cuff.

Tutorial here.


These are my favorites.


I used sheets that we dyed with RIT dye to get these fantastic colors.

But you can use whatever you have on hand.


 These would be great for a wedding party too.


And the last one just uses washi tape to dress up the bangles.


For the most part, it will take longer to assemble all the supplies than it will to make the bracelets.

An hour or two will produce enough to make a dent in that gift list.

Have fun!

Thanks for stopping by...

Linking up with these great blogs...

Monday, November 10, 2014

Mason Jar Monday #2... A Warm and Cozy Gift....


It's Mason Jar Monday Again!

This week is not technically a mason jar so I hope you will forgive me.

Today's jar project uses a recycled pickle jar.

I love saving these after the pickles are gone.

They are tall and thinner than a gallon jar so they fit more places.


In this case, it is roomy enough to house the contents for this gift.

First I painted the lid with a coat of DecoArt Chalky Finish paint in Serene.


Then I made a pair of cozy mittens to give as a gift.

These wooly mittens were made from a thrift store sweater.

  I used the pattern and directions from Hobby Farm Home.

While the magazine is no longer in print, you can find the directions here.

The mittens can be whipped together in an evening.


They will make such a cozy gift for someone.


I did learn that you have to cut the pattern precisely. 

I had one piece that had a wonky side and when I sewed it together it got all goofy.

I ended up having to take it all apart, trim the wool and sew it again.

They are much better now.


Next, add your mittens and a few pouches of hot chocolate to the jar.


Screw the lid on.


Add a scarf.


I tried tying it a few different ways...

In a bow...


 Folded in half with both ends pulled through...


And my new favorite way to wear a scarf...

Folded in half with one end pulled through, twisted and then the other pulled through as well.


Now you have a perfect cozy gift for someone special.

Anyone who lives where it is cold would appreciate this warm and wooly treat.

Once the mittens and scarf are removed, the jar can be used any way they want.

This is a proud part of 99+ Handmade Gifts...


Thanks for stopping by....

Linking up with these great blogs.

Monday, November 3, 2014

Mason Jar Monday #1 Christmas Snow Globes

Last week I was inspired to start Mason Jar Monday from now until Christmas.

I am a long-time collector of Mason jars.

I love all colors, sizes and styles.

For today's project, I am using wide mouth quart jars I picked up at the grocery store.

I started by gathering painting supplies for the lids.


I gave each lid a quick coat of DecoArt Chalky Finish Paints.


I love the colors in their line.


Then I gave each lid a light sanding to distress them a bit.

Now onto the insides.

First I glued the lid and ring together with a couple drops of hot glue.

Then I hot glued a Christmas tree and a little rusty tin moose to the inside of the lid.


I added the puddles of glue and let them cool a bit for the moose.

Then I pushed the moose feet into the glue and held it in place. 

 I added a little more hot glue and held it until the glue was cool and hard.


I added some opaque white glitter to the bottom of the jar.


I did another jar with just one tree that was a little larger.


Instead of the glitter for snow, I used a piece of Styrofoam that I had grated.

I really like the snowy consistency of it.

I added a little to the bottom of the jar.


I also put together and assembled two more jars.

I added a little knob or crystal to the top of each with some glue.


  I used a metal hardware ring to hold the glue and the crystal.

The crystal had a chipped bottom so I had to hold the crystal until the glue cooled.


For photography purposes, I set the jar on a mercury glass painted candlestick.

I think I will actually glue them onto some candlesticks because I love the look.


This little guy works from any angle because there is no front or back to the tree.


That is something to consider however when assembling your snow globe.


I did not think of that while I was gluing them together.

For this jar, I got lucky.


The moose lines up in between the designs in the jar.


I like this little snowy tree.

All the glitter and Styrofoam snow cover the glue at the bottom of the snow globe.


Here are both of the snow globes with the crystal knobs.


I used two trees in this globe.

One was a little too tall so I bent the tree slightly.


When you are screwing the whole thing together, shake the snow to be sure none of it gets pinned between the top of the tree and the top of the jar.


I used a little wooden knob for the top of this one.


I may paint the knob to match the lid color.


I used a variety of tree styles.


There were some trees and shapes that I did not use because they were too tall or too wide for the jars.

Be sure to check yours before you use them.


These were great fun to make.

They would make really fun Christmas gifts...

This is a proud part of 99+ Handmade Gifts...


Thanks for stopping by....

Linking up with these great blogs...