Showing posts with label up cycling. Show all posts

Monday, January 26, 2015

Recycled Materials Become Garden Decor


Are you thinking of warmer and greener days yet?

My favorite time to create is in the summer.

  I love to create outside in the sunshine.

I am planning my projects for warmer days.

I thought I would share a recap of some of my garden projects from last summer.

All of these are up cycled  from recycled materials.


I made a couple wind chimes.

This one looked great on my front porch.


Marbles, forks, beads, a flower frog, fishing line, and some plastic baubles all came together...


Reminds me of raindrops...


This fun and whimsical wind chime started with a lampshade skeleton.

You can read more about creating it here.

I sold this to a girl at my fall show last year.

She said it was sure to make her the favorite daughter since it perfectly matched her mother's style.

I hope it did...


I really enjoyed making it.


I am already planning another series of mosaic projects.

Last summer my daughter and I made a bunch of fun projects.

You can find the final post here.


Many of these were gifts to family and friends.

Everyone that received one seemed to genuinely love and appreciate them.


The one above went to my in-laws.

The tiles were retrieved by my father in law several years ago at an auction.

He chuckled at the memories.


This fun little bird was a ceramic bird from the dollar store.

She has found lots of homes around the garden every season.

I move her every so often.


This started with a gazing ball my friend gave me.


These glass mushrooms are sprinkled throughout the garden.

At a party we had, I had to smile at a friend who picked it up, examined it and showed it to his girlfriend...


The rebar keeps them upright and in place.

The tutorial for making them is here.


Chicken wire and a tomato cage became fun dress forms for the garden.

The post is here.


I love this one with the tutu.


This other gal got a raggedy strip skirt.


I plan to make a couple more variations of her for this year.

Wouldn't she make a pretty alternative to the typical garden scarecrow?

This gets me thinking about what to do this summer.

I hope you saw something that inspired you as well...

Thanks for stopping by....

Linking up with these amazing blogs.


Friday, October 24, 2014

Mercury Glass Pumpkin Tealights


I have been wanting to try making my own mercury glass.

I had a couple Halloween ideas in mind for them.

I got a can of  Looking Glass paint from Krylon.

I gathered my supplies:

clear glass jars from the thrift shop

painter's tape

 scissors

Krylon Looking Glass Paint

water bottle

paper towels


I cut shapes from the painter's tape for my pumpkin face and adhered them to the inside of the jar.


This little guy has feet.

Cute!


Gather your supplies...


Spray the inside of the jars with a light mist of water.


Then spray a light coat of the Krylon Looking Glass paint.


The hard part is waiting 5-10 minutes.

Then blot the water from the inside with the paper towel.

Now spray with a mist of water again and then another coat of paint.


Repeat to achieve the look you want.

Wait and blot the water each time.


If you get unwanted runs, you can rub or wipe them of with the paper towel.


You can see it is beginning to look more opaque.


I did a couple without the pumpkin face as well so I can use them year round.

I wanted a more opaque look on some of those, so I turned some of them upside down and repeated the process on the outside of the glass as well.


Once they were dry, I added tealights to them and tucked them into my fall vignette on the porch.  

You will be seeing more of that soon.


It is hard to photograph them well with the lights inside but the faces do show up nicely.


They add a fun touch to the porch.


I also painted a glass candlestick the same  to use as a base...


What fun!

 Now I am hooked on the Krylon Looking Glass paint and will be hunting for new things to try this on.

Thanks for stopping by...

Linking up with these great blogs...

Thursday, October 16, 2014

Sweet Felt Mushroom and Mice Cups

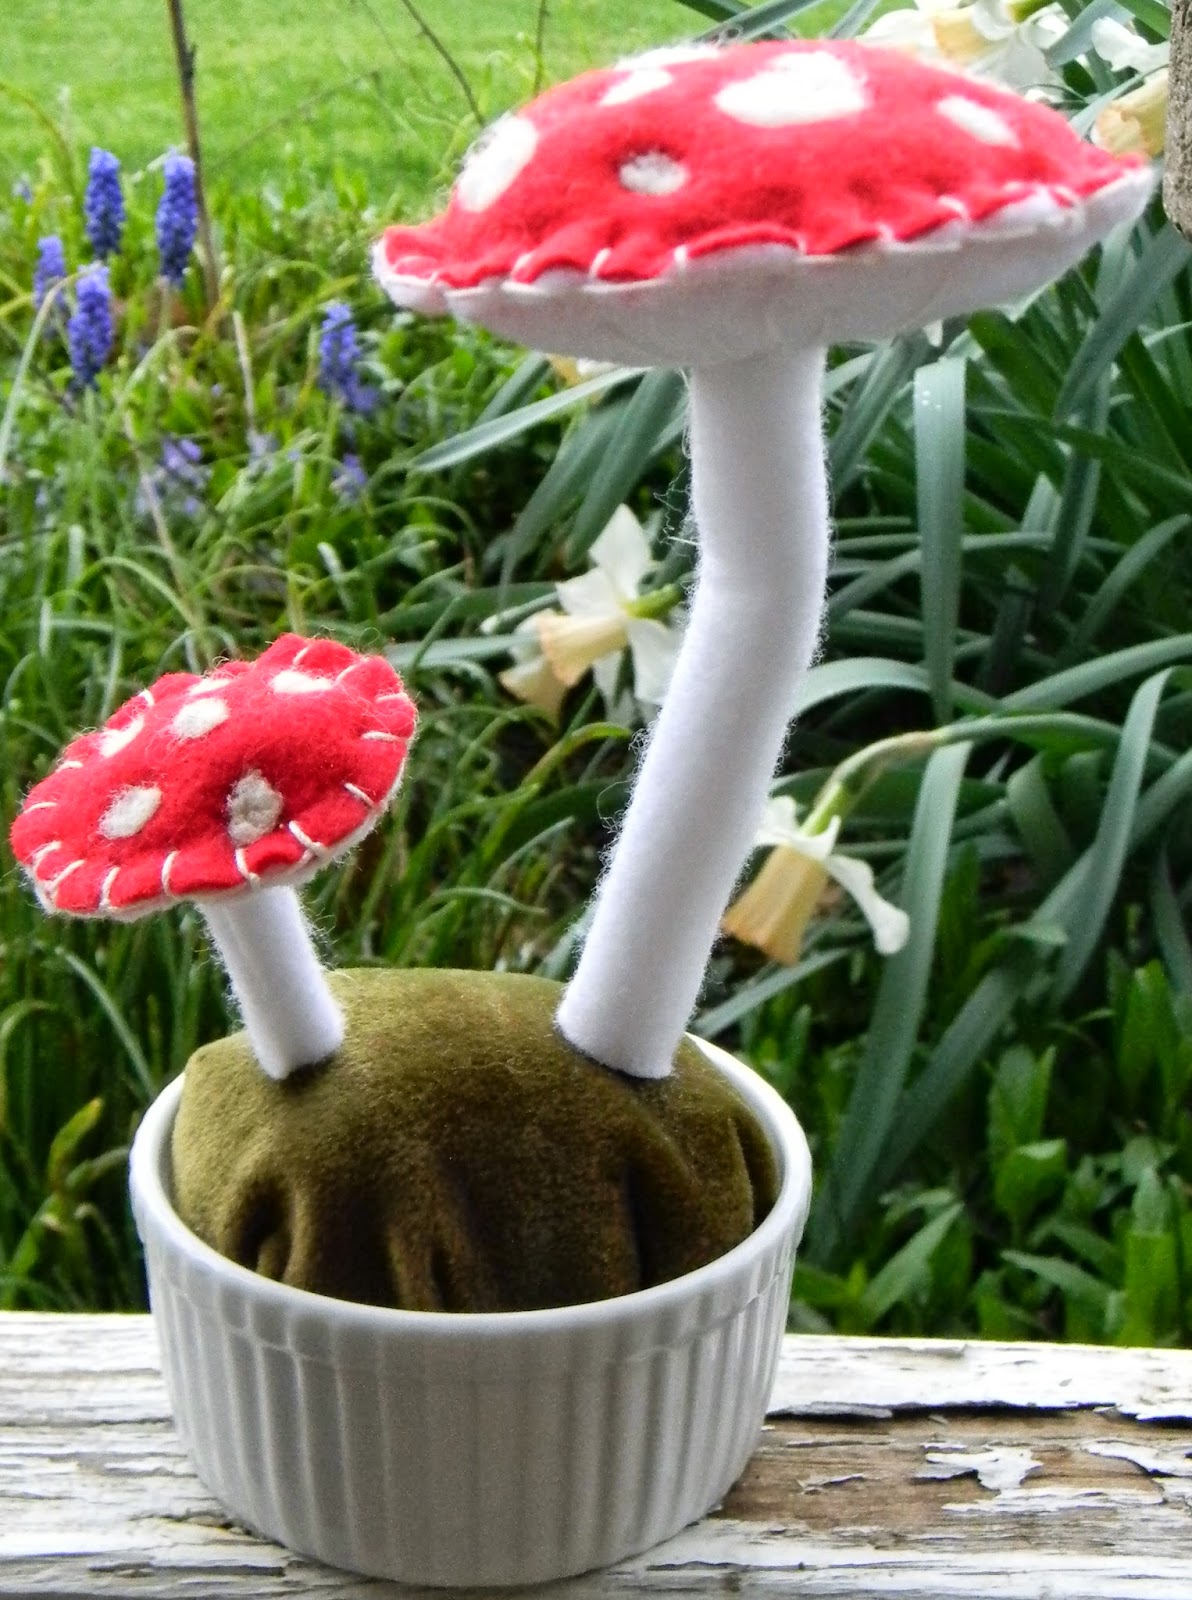
Today I wanted to share some sweet felted mushrooms....

I made this last winter and am ready to make some more soon.


They are just felt with some wool wisps and some poly-fill.

My base fabric came from the thrift store...

Such a score...

It was still on the bolt.

The taller mushrooms have a piece of rebar wire in the stem so it is anchored to the base better and I can bend and angle the mushroom.


The wool wisps were needle felted in the top to make the spots on the top of the mushroom.


This next photo is my favorite.

No filters or any changing of the tones...

It was just the result I got when I took the picture from underneath.

I was trying to show the stitching under the mushroom.


I actually use that photo as my avatar sometimes...


These make me smile...


I put my mushrooms in little containers from the thrift store.

I like that cups and such have some weight to hold them in place.

I also did some of these mushrooms with little mice.

I got the pattern from Rhythm and Rhyme.


I used sweet little yarn tails for my mice.

The mouse adds a charming touch.


You can see the underside of the mushroom here. 

 I stitched string to look like the gills underneath the mushroom.


I need to do some more mice with lighter thread I think...

Although I liked the quirkiness of this guy when I made him.

I even added acorn cap hats to a couple...


I gave several of these away when I made them to close friends and family.

I sold a couple at my fall show.

I only have two left...I think I need to settle in with the wood stove lit and a cozy fire to do some stitching.

Thanks for stopping by...

Linking up with these great blogs....