Showing posts with label #DIY. Show all posts

Thursday, December 10, 2015

Jingle-Corn Ornaments

Today I share one sweet little ornament...

A Jingle Corn...


Have a great Thursday!

Thanks for stopping by...

                  Linking up with these great blogs.

Monday, November 2, 2015

Taking Home the Tree Ornaments


Last year, Taking Home the Tree ornaments were all the rage...

With good reason...

They are adorable...

  Here are a few for inspiration this year.


I have been keeping my eyes open for small cars this year.

 I  pick them up when I see ones I like.


Some of them are new...


Like this little guy...

He looks old but he came right out of the box.


And then some are reclaimed.

I like the chippy, loved look.

I also like creating an unconventioanl interpretation.

Like this garbage truck... 

 How fun is this?


Cute on so many levels...


If a had a son, I would so make him an ornament for the tree with his favorite kind of truck.


I did clean this little guy up so the dirt left on him is intentional...


This little car is new as well.


But it is perfect for a vintage look ornament.


I add a drop of hot glue to the top of the car and add the tree.

The baker's twine is mostly for show and a way to hang the ornament.


Hope you make a few of your own...

Thanks for stopping by...

Linking up with these great blogs.

Monday, September 7, 2015

Mummy Treat Cans- 15 Minute Halloween Craft Lightning

It's time for Craft Lightning again!

This time, 15  Minute or Less Halloween Crafts.


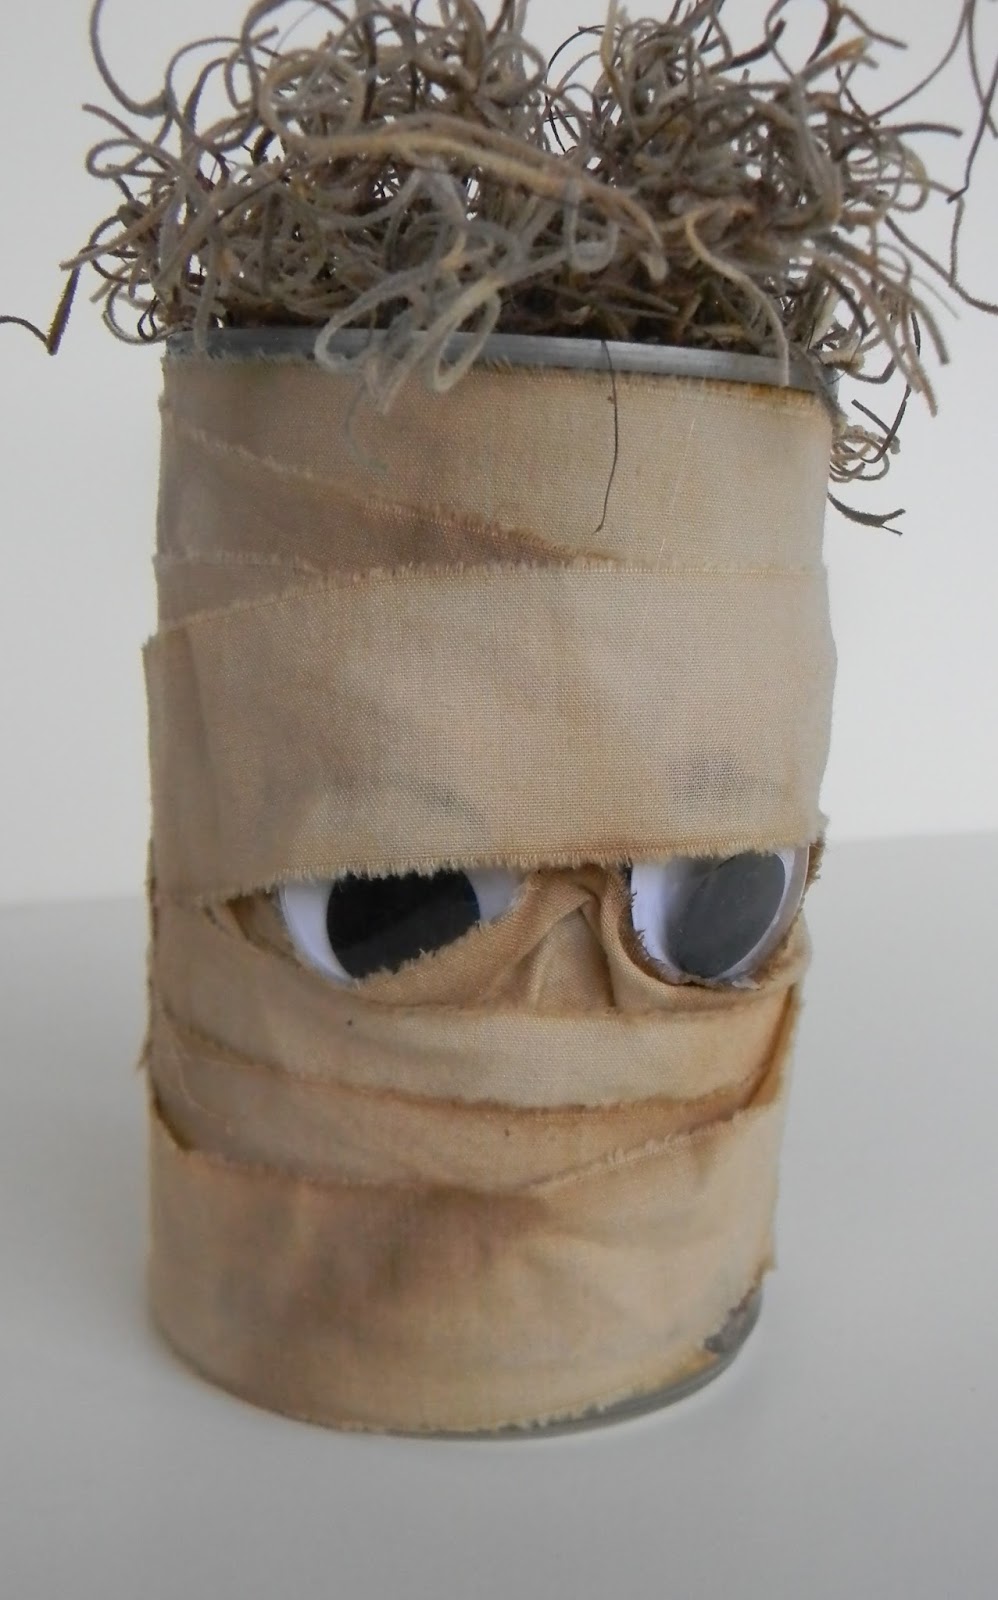
So here are some fun Mummy Treat containers.


Start with a can or bottle from the recycling bin.


Wash them thoroughly and let them dry.

Now gather your other supplies:

wiggle eyes


old white sheets (or muslin or fabric) and scissors.


And your glue gun and glue sticks.

Yup!

That's all. 

 Are you ready?

Great!

Snip cuts in your fabric about every inch.


Rip into strips.

Since I used a full sheet from the thrift store, one strip completely wrapped one can or jar.


Next glue your eyes onto the can.


Then glue one end of the strip at the top of the can and start wrapping.

I used a bit more glue to secure the fabric around the eyes. and at the bottom of the can.

I kept wrapping until I used the whole strip and then I glued the end.


How cute and easy was that?

You can make an army of these in an hour.

Here is the jar finished.


You could paint the lid and add goodies inside.

You can get a whole different look with smaller eyes.


You can also change the whole look by coffee staining your strips.

Follow my easy coffee staining recipe here.


The stained strips give your mummy a whole new personality.


Sort of menacing.


For other variations, drill holes in the can to add a wire handle.


Add candies instead of Spanish moss.


Want to learn how to make the cute canning lid pumpkin too?

It takes a lot longer than 15 minutes but it is so cute.

The post is here.


The pumpkin gets dressed up with some vintage book page strips added for interest.


Here is my little mummy family.


That pumpkin is a renegade from last year. 

 Where I threw the pumpkins after Halloween a vine sprouted in the weeds.

 When I was mowing past the area, I spied this little guy in the over growth.


What a great fall surprise!

And just in time for the mummy cans.


Thanks for stopping by....

Check out the other great 15 Minute crafts this week at


and 


Sunday, August 30, 2015

Plaster dipped silk flowers...


Have you seen plaster dipped silk flowers?

I saw them last fall and was enchanted. 

 I wanted to try it for myself.

Sometimes, the crafting gods deliver what I need right to my doorstep (almost).

Last winter, a small silk flower arrangement blew into our yard on a windy day.

There were red, white and blue silk roses stuck in a piece of styrofoam.  

The flowers were all faded and my husband was going to throw it away.

I saved it just for this project.


I mixed plaster with some water to make a little thinnner than pancake batter consistency.

Then I dipped each rose into the mixture and pushed it down several times to coat all the petals.

I hung them on this card display.

The newspapers below are very important.


The red and blue roses required more than one dipping to cover the flower as much as I wanted it to.


These were the white roses and I only dipped them once.  I liked the finer, more delicate look only one coating created.


They have the look of porcelain.


The blue and red ones were dipped twice and have a chunkier look to them.

You can also see where they were touching the hook below on my rack as it left a mark when the flowers were removed.


I wanted to make a coastal arrangement to say good bye to summer.

First I spray painted this hammered aluminum two-tiered stand.

Then I added my plaster flowers and some coastal touches.


I started with some spanish moss to fill the trays.


Then I added starfish, seashells and pearls.


I gathered another handful of smaller shells and went back to fill in some bare spots and cover  any chips in the plaster.


I also added some of the plaster-dipped leaves.


It is a fun coastal arrangement.


Right now it is on my front porch next to the door.


For these photos, it is on my workbench on the back porch.


I think something like this would be so fun to do for a coastal wedding.


Some sisal rope would be a great addition as well.


I really enjoyed this process.


It was fun and easy to do.


They are pretty fragile so it not something you want to do for things that will be banged around or handled a lot.


Once I am done with them in this arrangement, I may do a fall version with leaves and a Christmas version with either poinsettias or evergreen branches.


I removed my roses from the stems, but you could make an arrangement in a vase too.


The plaster hardens in the cup relatively quickly but it was hot and humid when I did mine, so they took a minimum of overnight to dry.


Thanks for stopping by....

                  Linking up with these great blogs.