Showing posts with label old sheets. Show all posts

Wednesday, June 1, 2016

Shabby Chic purse

I have always wanted to make one of those great shabby chic purses...

You know...the ones with whites and creams, lace and more.

So last summer I made myself one.


I had tons of fun getting things out and layering them onto my bag base.

For the base I used 2 quilt squares that have button holes around the edges.

I also re-purposed some pretty sheets from the thrift store for the fringe on the bottom and the strap.


The strap is long so it can be used as a cross body bag.


I printed a few fun images on muslin.

When I do that, I make tons all at one time and then use them as inspiration strikes.


Time to make another purse soon I think....

Thanks for stopping by....

Thursday, September 17, 2015

15 Jewelry Projects From Up Cycled Materials

I am always looking for ways to reuse something I have or something someone has discarded.

I also love the challenge of taking something common and doing something uncommon with it.

Take a look at some jewelry projects that started with some very non-jewelry related items.

These bangles got an upgrade with buttons and some earring flowers.

Find the post here.


A vintage spoon and a bullet casing became this fun necklace.

Find the post here.


These fun rose bracelets are actually made from plain white sheets.

See how to make your own here.


And more sheets transformed this bangle to a fun cuff.

Tutorial here.


These plastic bangles got a makeover with some washi tape.

Make your own by following this tutorial.


The following pieces remain among my favorites to this day.

These were made from plastic tubing, shotgun shells and were dressed up with recycled silk strips.

See the full post here.


Some incorporated hardware pieces as well.


Don't throw away that old puzzle because some of the pieces are lost.

Make some earrings instead.

See the post here.


You might want to raid your kids pockets after seeing this post.

A simple glass marble becomes a fun yet sophisticated necklace.

See it here.


The same post shows how to turn a tiny glass Christmas ornament into a tiny time capsule.


A bullet casing can become an amazing jewelry piece.

See the full post here.


These pretty earrings started with some paper flowers from the scrapbooking section of your favorite store.

See the post here.


How about making some very artistic earrings from some beads, yarn and discarded book pages?

See them here.


More buttons...

This time getting a new life as a fashionable choker.


This bohemian sweetheart stars beads made from felt and discarded book pages.

See the post here.


I promise to bring you more up cycled jewelry pieces soon.  

It is my favorite thing to create.

Thanks for stopping by....

                  Linking up with these great blogs.

Monday, September 7, 2015

Mummy Treat Cans- 15 Minute Halloween Craft Lightning

It's time for Craft Lightning again!

This time, 15  Minute or Less Halloween Crafts.


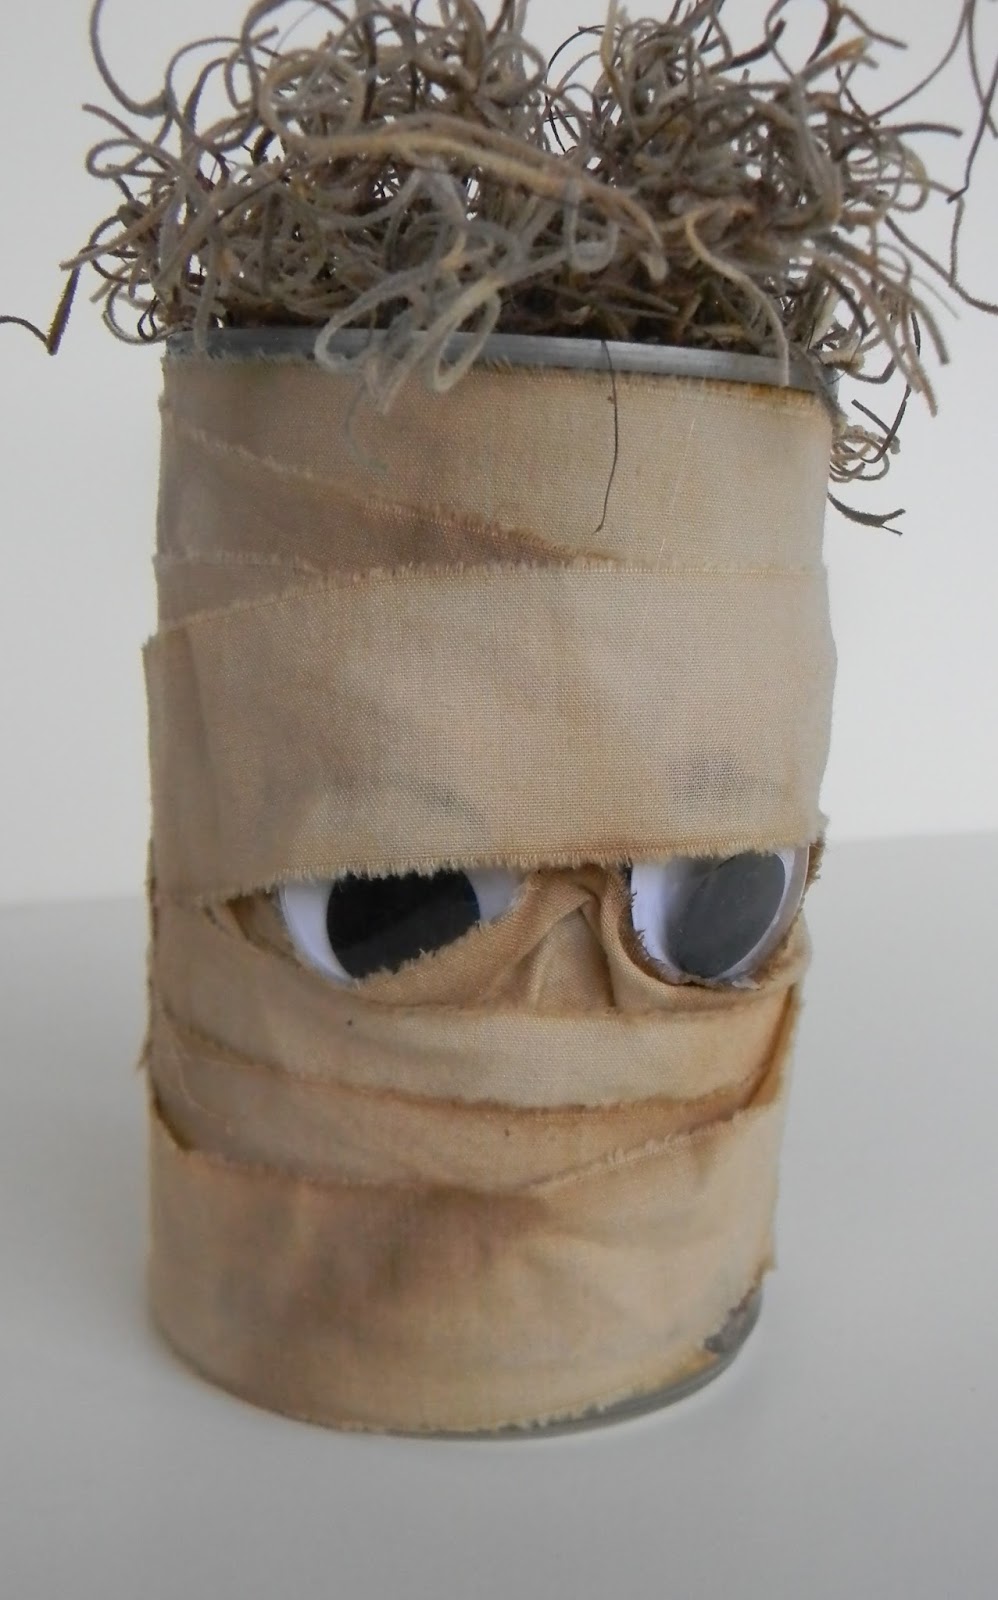
So here are some fun Mummy Treat containers.


Start with a can or bottle from the recycling bin.


Wash them thoroughly and let them dry.

Now gather your other supplies:

wiggle eyes


old white sheets (or muslin or fabric) and scissors.


And your glue gun and glue sticks.

Yup!

That's all. 

 Are you ready?

Great!

Snip cuts in your fabric about every inch.


Rip into strips.

Since I used a full sheet from the thrift store, one strip completely wrapped one can or jar.


Next glue your eyes onto the can.


Then glue one end of the strip at the top of the can and start wrapping.

I used a bit more glue to secure the fabric around the eyes. and at the bottom of the can.

I kept wrapping until I used the whole strip and then I glued the end.


How cute and easy was that?

You can make an army of these in an hour.

Here is the jar finished.


You could paint the lid and add goodies inside.

You can get a whole different look with smaller eyes.


You can also change the whole look by coffee staining your strips.

Follow my easy coffee staining recipe here.


The stained strips give your mummy a whole new personality.


Sort of menacing.


For other variations, drill holes in the can to add a wire handle.


Add candies instead of Spanish moss.


Want to learn how to make the cute canning lid pumpkin too?

It takes a lot longer than 15 minutes but it is so cute.

The post is here.


The pumpkin gets dressed up with some vintage book page strips added for interest.


Here is my little mummy family.


That pumpkin is a renegade from last year. 

 Where I threw the pumpkins after Halloween a vine sprouted in the weeds.

 When I was mowing past the area, I spied this little guy in the over growth.


What a great fall surprise!

And just in time for the mummy cans.


Thanks for stopping by....

Check out the other great 15 Minute crafts this week at


and 


Thursday, September 11, 2014

Got Old Sheets and Coffee Filters? Make this Awesome Shabby Chic Banner...


This sweet banner is made from old sheets, coffee filters and twine.


The coffee filter roses are a cinch to make.

Just dye your filters like I described here.

I used Fuchsia RIT dye and lots of instant coffee granules in the dye bath to get the muted grubby rose color.

Next, loosely fold your coffee filter in half and in half again.


Pinch the pointed end and twist.


Some people staple it at this point, but I find the twisting usually holds well enough.

Each rose takes 7-12 coffee filters.


Lay down one filter as the base.  


Glue 6-8 filters around the edge of the circle.


Finish with one or two in the center.


Now you can add them to a bamboo skewer, your wall, the cover of a book, etc.

For this banner, I glued 2 roses back to back with twine sandwiched between.

I used three different twin sheets from the thrift store.

Two were floral patterned and one was the palest blue.

The sheets were ripped into strips.

Then a pulled off the loose threads.

And I cut them the desired length.

For these, they were about 8-10 inches long.

I just tied them to the twine while watching TV.

I love how it turned out...


I am not sure where it will end up.

Maybe in the studio...


Maybe as a gift...


For this post, I clipped it to the fence in the back yard.


I hope it brightens your day....


Thanks for stopping by....

We will be linking up with these great blogs....