Showing posts with label thrift stores. Show all posts

Thursday, September 4, 2014

Thrifty Thursday~ Score!


I stopped by the thrift store last week for a quick drop off.

In and out.

That was the plan.

In the back room where they sort and price stuff,  I saw these goodies when I carried in my donations.

Six thread racks.

$1 each.

And a package of really big coffee filters for 50 cents.

I did not come home empty handed....


WooHoo!


Three of the racks are regular size dowels for spools and three are extra big.

I am not sure yet where they will go.

Maybe in the studio.

Maybe in the booth this fall to hold something.

I'll let you know....

Thanks for stopping by....


Thursday, July 31, 2014

Thrifty Thursday...Glass Mushrooms for the Garden....

A trip to the thrift store with my daughter yielded supplies for a quick garden project.

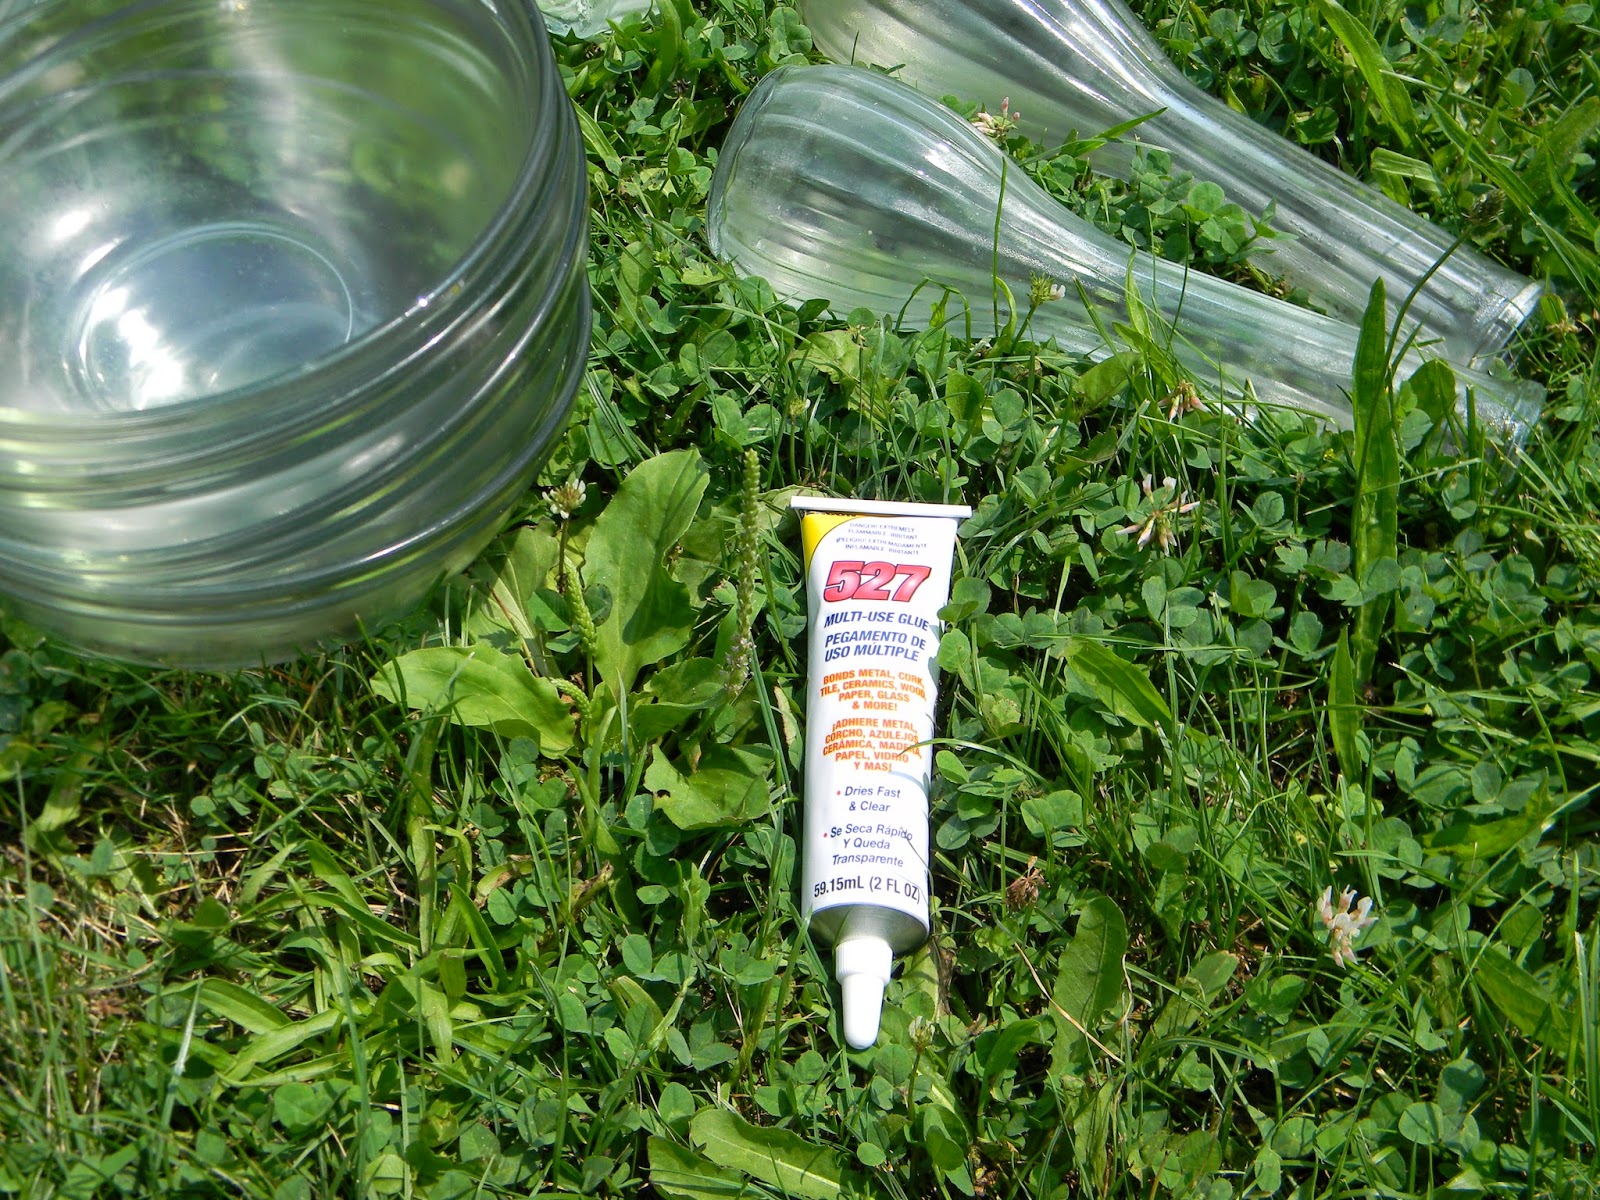
Thrift stores never seem to lack glass vases and glass bowls.

I picked up 5 of each.


I gave them a wash in the dishwasher.

It was a really hot, humid day when I did this.

You can see the glass steamed up when it came outside from the cooler house.


I used some of Beacon's 527 glue.


I put the bowls on the driveway and ran a line of glue around the raised edge of the bottom of the vase.

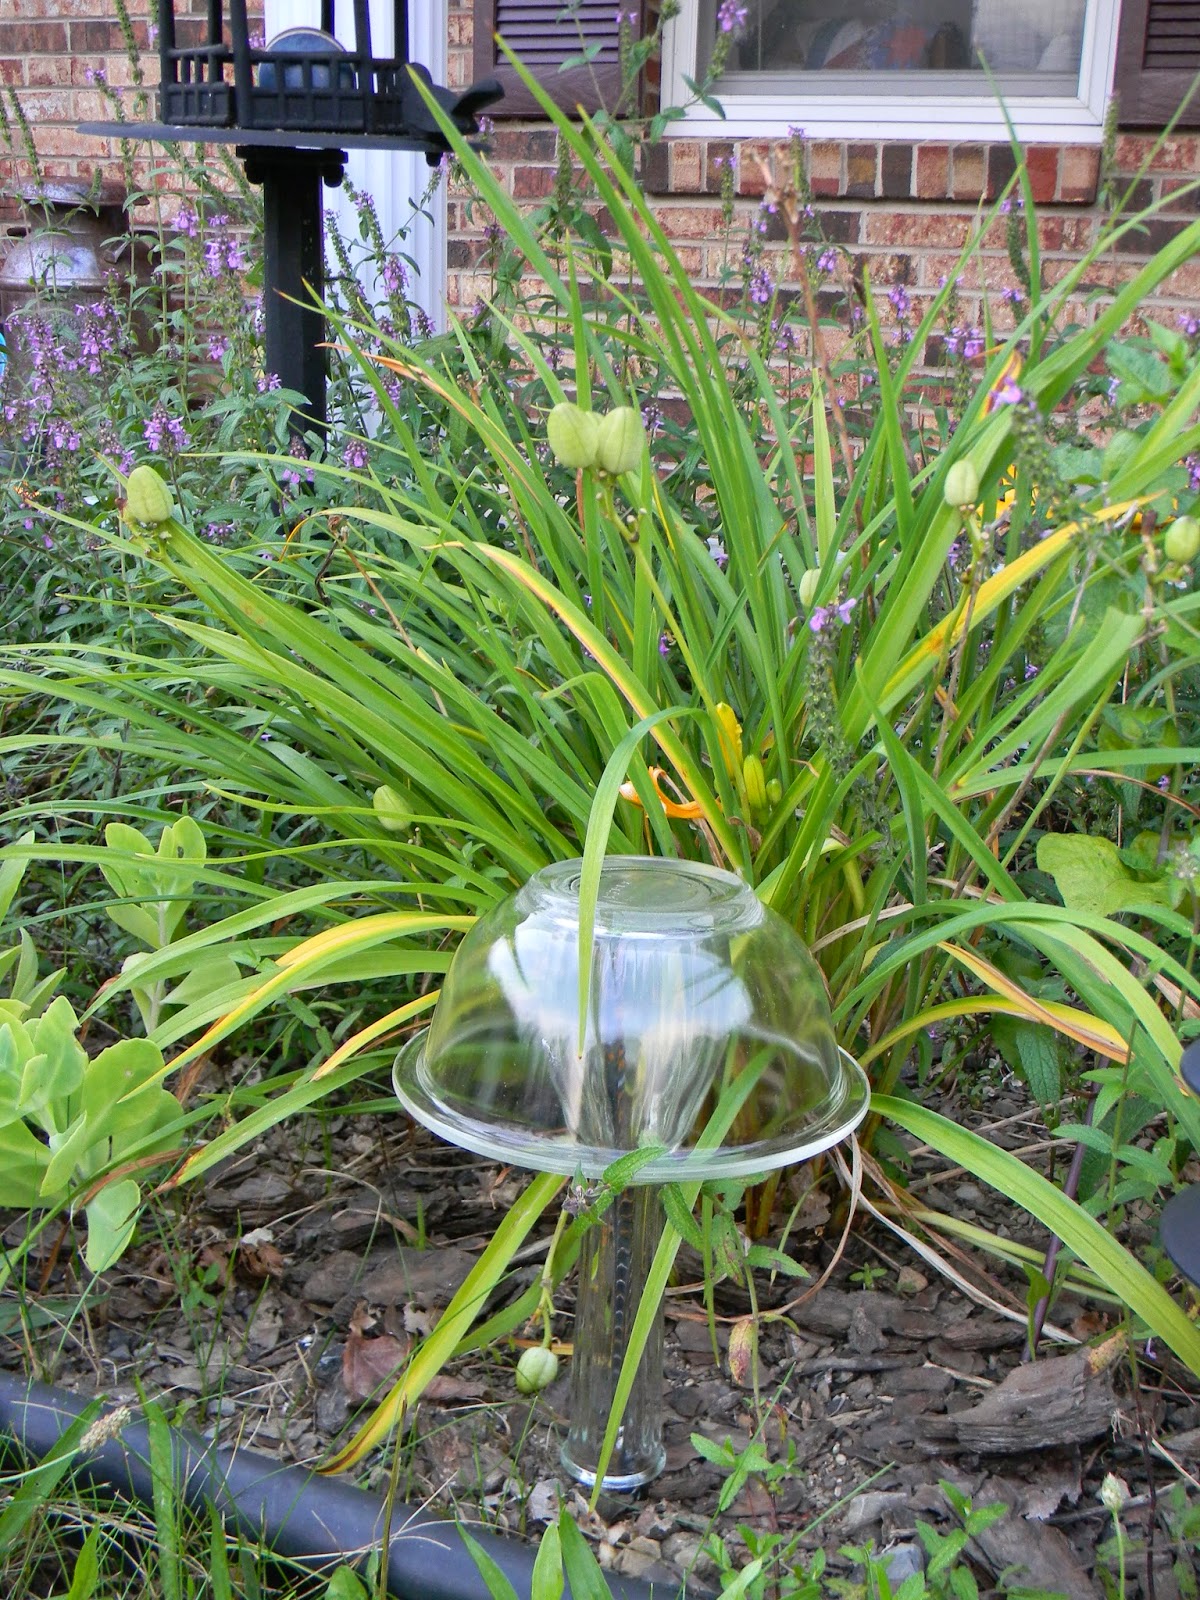
Then I just set each one in the bowl and let them sit until they were dry.


It took mine about 4-6 hours before I actually took them in the garden for placement.

I would recommend over night or longer just to be sure.


You may wonder why on earth I glued the vases that way...

I have a good reason.

I don't want them to keep tipping over.

I took a piece of rebar and pounded it in the flower bed with a hammer.


I slipped the mushroom on and we are good to go.


Even a heavy rainstorm or small animals running by won't tip these mushrooms over.


This would be a super easy kid's craft.

You could even paint the glass with glass paints.


I wanted the subtle clear look this time.


Since I made 5, I have plenty to go around.

I added a piece of rebar to the planter in front of the garage.


And the mushroom perfectly fills a little space there.


You may already have everything you need at home for this quick project.

Thanks for stopping by...

Linking up with these great blogs...

Monday, June 30, 2014

Awesome Studio Storage From the Recycling Bin...

Redoing the studio gets a girl dreaming.

At least it gets this girl dreaming.

Every artist wants that Pinterest worthy, picture perfect, naturally lit dream studio.

See my Pinterest Board here:


Reality is a whole different story.

Remember....

My actual studio style is....

PILES.

and

STACKS.

And 

More Piles.

But a girl can dream, right?  

Sometimes she can even do a little something about it.

Not too long ago, while shopping at Sam's Club, I found this awesome 3 tired galvanized stand back on the clearance shelves.

I was in love.

Only one left.

$24.90

Not as cheap as I would like, but reasonable.

Suddenly I remembered I might have a gift card from Christmas.

I put the stand in my cart so no one else could scoop it up while I went digging.

In my wallet.

For a card...???

Maybe?

Yes!

A $25 gift card.


My mother-in-law would be so pleased to have gotten me such a fantastic gift that I am going to like so much!

So I brought it home. 

 My husband just sort of shook his head.

It will be perfect for my studio.

Or parties.

Or on the kitchen island.

Then it sat sadly on the floor in my garage while I dreamed of a clean studio for weeks.

Now that I am organizing, it has a new home.

On my little rolling cart.


On top of the pretty new blue cutting mat my daughter bought me for mother's day.


Right now it is filled with coffee filter flowers and burlap flowers and scraps....

But I wanted more tiered stands....

So I spied a silver lazy Susan cake stand that I got at the thrift store this winter.

Among the piles on the garage floor.

I headed to the recycling bin.

And back to the garage for a couple silver plates and platters.

I began stacking and re-stacking until it worked.

Here are the before materials:


Excuse the dew on everything.  

I washed them with a hose and then left them outside overnight.

Took the photos in the morning before the dew burned off.


Next came a couple light coats of white spray paint.

Now things look like this....


I wanted everything to have a white base coat.

The cans look OK.


But I LOVE the trays...

They look just so pretty.


I almost changed my mind about using them...

I decided I will enjoy them more if they are being used every day...


Next I assembled my decorating materials:

a burlap bag, lace, images from the Graphics Fairy I printed on muslin with my printer, my glue gun, old hymn pages, some buttons and twine, a cupcake wrapper for wings, a wee bit of glitter and a couple twisted fabric flowers.

Decorating was fun once I got the burlap the right size for each can.

I just wrapped the burlap around each can and glued it in place with the glue gun.  

Then I added and glued other goodies until I liked the look.

To assemble the whole thing, I did not want to make it permanent.

So....

I got out some magnets and pried them apart.

I put several on each can to secure it to the stand.

I planned to use earth magnets for the center ones to keep them in place securely.

That did not work out as planned so I did use the glue gun to secure the center cans.

Then I wrapped twine around the glue to hide it.

Then I added my goodies. 

Bakers twine in old sugar shakers.

Markers and pens.

Pencils and scissors.

TA-DA!


Carrying this outside, assembled, was a circus balancing act.

But I did it!

I want to show you bits in detail....

I love the baker's twine shelf....


The burlap flower was added because the sugar shakers were too wide to put all of them on one shelf.

I had to make the center can slightly off-center to 
accommodate the sugar shakers...

which did not leave very much room on the other side...

So I added the little spools and it needed something above....

A burlap rose.


The bottom shelf is my favorite....


Those cans were as much fun to make as they are to look at.

And for once, I have some of my better supplies at my fingertips instead of being hidden away in drawers and cupboards.


Now I might actually use them...


Who could resist such temptation?


Each can has its own personality...


I want to let you enjoy each up close....


 I love the mica glitter and the little resin clock face I made...


The simplicity of the burlap really only needs a couple buttons to completely dress it up.

This burlap bag was so thick and soft.

My daughter is a barista and she brings me the coffee sacks when they are empty.... 


I love images from the The Graphics Fairy.  

There is so much you can do with them...


This one only needed a bit of lace.


This one is actually printed on card stock and carefully trimmed.

I got the crocheted snowflake at a craft show.

A sweet lady made them and sold them for 25 cents each.

I wanted to make her day so I bought every one on the table.

Came back a few minutes later to see she loaded the table again...

She must have had a trunk full of them under the table...

Sigh!

I defied gravity and Fate a second time by carrying the organizer inside again.

We made it!

Here she is on the now clean work table.


That's my transformed candlestick next to her.

She looked a bit undressed, so I added a necklace I made.


Such a pretty stand. 

 Who would have known its humble beginnings...?

From the recycling bin.

Thanks for stopping by....

See who we are Linked with HERE.

Also, note these new parties:


From My Front Porch To Yours

My Repurposed Life

Monday, June 16, 2014

Studio Reorganization...Making Headway....


So last week I showed you the top of my cupboards. 


They were overflowing with yarn.


I know, scary.

So over the weekend, I got the top of the cupboards looking better.

First, I got all of it down.

I cleaned out a bunch of neat containers...inside and out.

I put a couple dryer sheets in each to make sure they did not start to smell funky.

I sorted the yarn and stuffed those containers full.

Pinks and Purples.


Neutrals...


Heavy, thick wool yarn.


Blues....


Pure wool yarn.


How does someone who does not knit have so much yarn?!

Then I reorganized the tops of the cupboards with the new storage.


These cool suitcases without handles came from a junking trip last week.  

They have a couple small cracks but up there no one will see the damaged parts.

I rolled some burlap bags up and put them on top so I didn't waste any space.

Next I took the mason jars of buttons and gave them a new base.

I used an antique tin tray to corral them in one area.

Underneath I gave the tray support with some scrap wood blocks.


 I had to make sure the next suitcase did not stick out because of the ceiling fan.

This cool old cardboard suitcase was hidden under the dry sink in another part of the studio.

  I like it better here.


More burlap sacks, some dyed burlap and some cool rolls of corrugated paper.


Next is another tray of mason jars.

  There are some zippers and other goodies in these as well as buttons.

Last, but not least is an old blue round suitcase with a tin of buttons on top, an old typewriter case, and a basket I got junking a couple weekends ago.


They are all full of yarn.


Whew.

Looks better. 

Just another couple photos so you can see the change.


You can see my fair ribbons on the cupboard doors.

Every summer we enter lots of goodies in the county fair....

mostly flowers and herbs...

flower arrangements....

sewing projects....

crafts...

and art pieces....

It is a ton of fun.

I love my ribbons.

The premiums check usually goes for some sort of fun new supplies.


At one point while I was working on this, my daughter came out and gave me the look that says,

"Why, with this whole mess, are you doing that?"

Easy.

Because this is a small area that I can see an improvement quickly.

I can also see if from everywhere in the studio so when I feel overwhelmed, it is a glimmer of hope.

See....you only see what I show you....

Here is what she sees......


Yup!

I have some work to do.

  I will show you more later.

Thanks for stopping by.....