Showing posts with label bottle cap. Show all posts

Tuesday, May 24, 2016

She was a Collector of things

Last year I reorganized my beads and components.

They are sorted by color or material.

I am finding this is opening new doors when I create since so many like things are gathered together.

I have had an idea for a Collector Series.

And this was the very first piece I made for it.

I have to say, I love this one....


All the components and charms came from my metals, vintage and handmade components boxes.


This is the year I start to use those things I love and have been saving...


So you may notice some sweet little vintage wonders among all that goodness...

Like the bottle cap and brass tag...


Components that I bought and hoarded saved like the resin pieces and rhinestone bottle caps now are a piece of something bigger than themselves.


I am still on the fence about whether I keep this one or let it go to someone else...


Tassels and nests and buttons...Oh My!


This piece is called She Was a Collector of Things...


It is a bit of a biography....


Aren't those the very best kinds of pieces?

Something that tells a story?


So I am hoping this makes you want to make something that tells your story....


A charm bracelet or a necklace...

Of course it may only have a few curated charms....

Just a chapter of your story....

What are you waiting for?

Go make something amazing!

Thanks for stopping by....

Sunday, February 14, 2016

Archaeology Necklace

Sometimes it is just fun to do something that is outside your usual style.

A friend and I decided to try to make some things with a decidedly grubbier and darker look.

It involved a lot of JAX Pewter Black.

I used it to age some chains, focals, and beads.


And this Archaeology necklace was born.

Glass and polymer beads were combined into this fun necklace.


The smashed bottle cap with a map covered in resin looked so much better after it was painted with JAX.

Now I love it.

It was in my failures pile so I figured nothing ventured, nothing gained...

What a gain...


I made links for each of my beads and then dipped them in Jax.

They all got rubbed with wax and buffed.


The fiber piece was made from a bit of a muslin sheet.

I dipped it in watered down black paint and then waxed it.

And those little twisted wire jump rings...

I made them...

Now THAT was fun!


I thoroughly enjoyed trying a new look.

I will be doing more of this style for sure...

What have you tried that was new for you?

Thanks for stopping by...

Monday, September 14, 2015

Art Queen Bee Set

It has been a busy week.

Our weather was HOT!

It finally cooled off which makes me begin to start rushing around like a squirrel gathering nuts for winter.

It was a busy weekend cleaning areas for the coming cold weather.

I can gleefully say the back porch and wood shed are winter ready.

Yay!

And inside I have been making beads.

So many beads from polymer clay.....

I have  new series planned and it is going to take lots of beads.

You may see some glimpses of them on an upcoming Workbench Wednesday.

For today, I am sharing this necklace and bracelet set I have made.


These are glass beads.

I did not make them.

They are knotted on waxed linen cord.

You know how I love to do that.


I think the blingy bottle cap is fun.


I use my homemade wire clasps.


I am liking my own better and better.

They suit my designs.

They are easy to use.

They add a little something to a piece.


When I first started my Etsy store, my husband made me a light box.

It worked ok, but often my photos had a yellow cast I could not quite get rid of even with some photo editing.

Now I take pictures on my front porch or the back porch depending on the time of day.

I love the look of the indirect natural light.


This set has a little multi strand bracelet as well.


The little crown dangle is a sweet addition.


Looking at these pictures makes me want to knot beads all day...


But work calls.

Beads will have to wait.


Hope you have a great week.

Thanks for stopping by....

                   Linking up with these great blogs.

Friday, August 28, 2015

Scarlet

One color I almost never use exclusively in designs is red.

I am not sure why.

I love red.

Red cars, red accents, red birds...

This necklace and bracelet set uses scarlet beads and wood beads with leather.

Oh, and a tiny bit of bling.


It is also a fun way to play with knotting and design.


The necklace is strung on waxed linen cord first.


The leather cord is added as a design element afterwards.


My handmade wire components are perfect for this design.


I like the wooden beads too.


I guess I just love natural components.


I made a little triple strand bracelet to go with it.


It is also strung on waxed linen thread first and then the leather cord elements are added.


One challenge I always face when making jewelry is to make it smaller.

I have large wrists, so to fit me it needs to be big.

For most everyone else, I have to make it too small for me.


This one is like that.

Too small for me.

Perfect for someone  else.


Thanks for stopping by....

                   Linking up with these great blogs.

Saturday, July 25, 2015

Last Guest Post at Plucky's Second Thought

My Last post with Jess is up over at Plucky's Second Thought.

Head over to find it here.


If you want to see any of the other posts I did over there, here is a quick round up.

This post shares ways to keep your child reading during the summer.


Want to see how to make this cute Peas in a Pod necklace?

Find it here.


This necklace was one of my favorites.


Find the post here.

I showed some sweet tin ornaments for your country Christmas tree in this post.


As a part of my Msason Jar Monday series, I did a pet post here.


Looking for a fast easy gift?

Try hopping over to see the tutorial for these Butterfly Earrings.


And here is the another pair of easy Clay Earrings.


It is a nice little walk down down Memory Lane for me as well....

Thanks for stopping by...

Tuesday, July 22, 2014

Fabric Mixed Media Book...

I have long been fascinated and inspired by fabric books.

I love the old and shabby look of creations by amazing artists such as Viola from Shabby Chic Inspired....


and Karen Valentine from My Desert Cottage...


So with the fair coming up soon, I decided to finally tackle one of my own....

Here is the result.

I started with some quilt squares I got at a local surplus store.

  They came 4 in a pack and were already assembled as a finished square with button holes around the edges so you could easily build a quilt.

This is the cover.


I bound my book with yarn and fibers.

I cut a variety of ribbons and fibers and used a crochet hook to pull them through the button holes.

Then I tied them loosely in a knot.

The cover already had the lace as part of the quilt square.

I attached the word "Dream" by basting each letter on.

I bought the letters at the thrift store a couple years ago.

I think they are the ones you use on signs.

I cut the little tabs off with scissors.

I added a twisted satin flower and a piece of fabric that I dyed from a discarded set of curtains from my brother.


I wove an old pearl necklace through the button holes around the edge and attached a charm I made from hardware, rhinestones, one of my polymer beads, a frozen Charlotte head, and resin.


  When you open the book, you can see the first two pages....


Images from The Graphics Fairy were printed on muslin and sewn on the pages.


The other end of the pearl necklace from the front got a vintage music resin bottle cap charm added.

The secret here for the aged look resin is to use car resin which is amber instead of clear.


The letters are made from polymer clay in a push mold.


I antiqued and sealed them.

This page also has a UTEE covered book page leaf, a polymer clay music charm, a cheesecloth twisted flower, and a resin cube encasing a vintage crocheted flower and lace.


I love this cheesecloth flower...


Behind the resin cube are two white feathers.

A little polymer flower accents the end of one feather.


The next two pages are butterfly inspired.


Another great image from The Graphics Fairy.

A seashell with another image from her transferred onto it.


I love this sweet little girl.

The little blue mirrors are button attachments I bought when I got the quilt squares.


This page has a library card sewn in as well as a butterfly poem from a children's poetry book.

The library card is a pocket so little treasures can be tucked inside.

This page also has butterflies and flowers galore.


I adore how inking the edge of a die cut really makes it pop.


Staz-on ink is my favorite...

Die cuts are accented with handmade polymer hearts and flowers or frosty acrylic accents.


The twine flower is made by making twine loops and the gluing them and adding a button on top.

The trick is to make it on a hot glue release mat.

Just pop it off when it is cool.


Here are the last two pages.


The left hand page has cheesecloth and burlap sewn on and then two of my tags were added.

Cheesecloth and crepe paper are two of my favorite materials.


This little handmade chalkboard tag is so sweet.


This last page was so much fun.

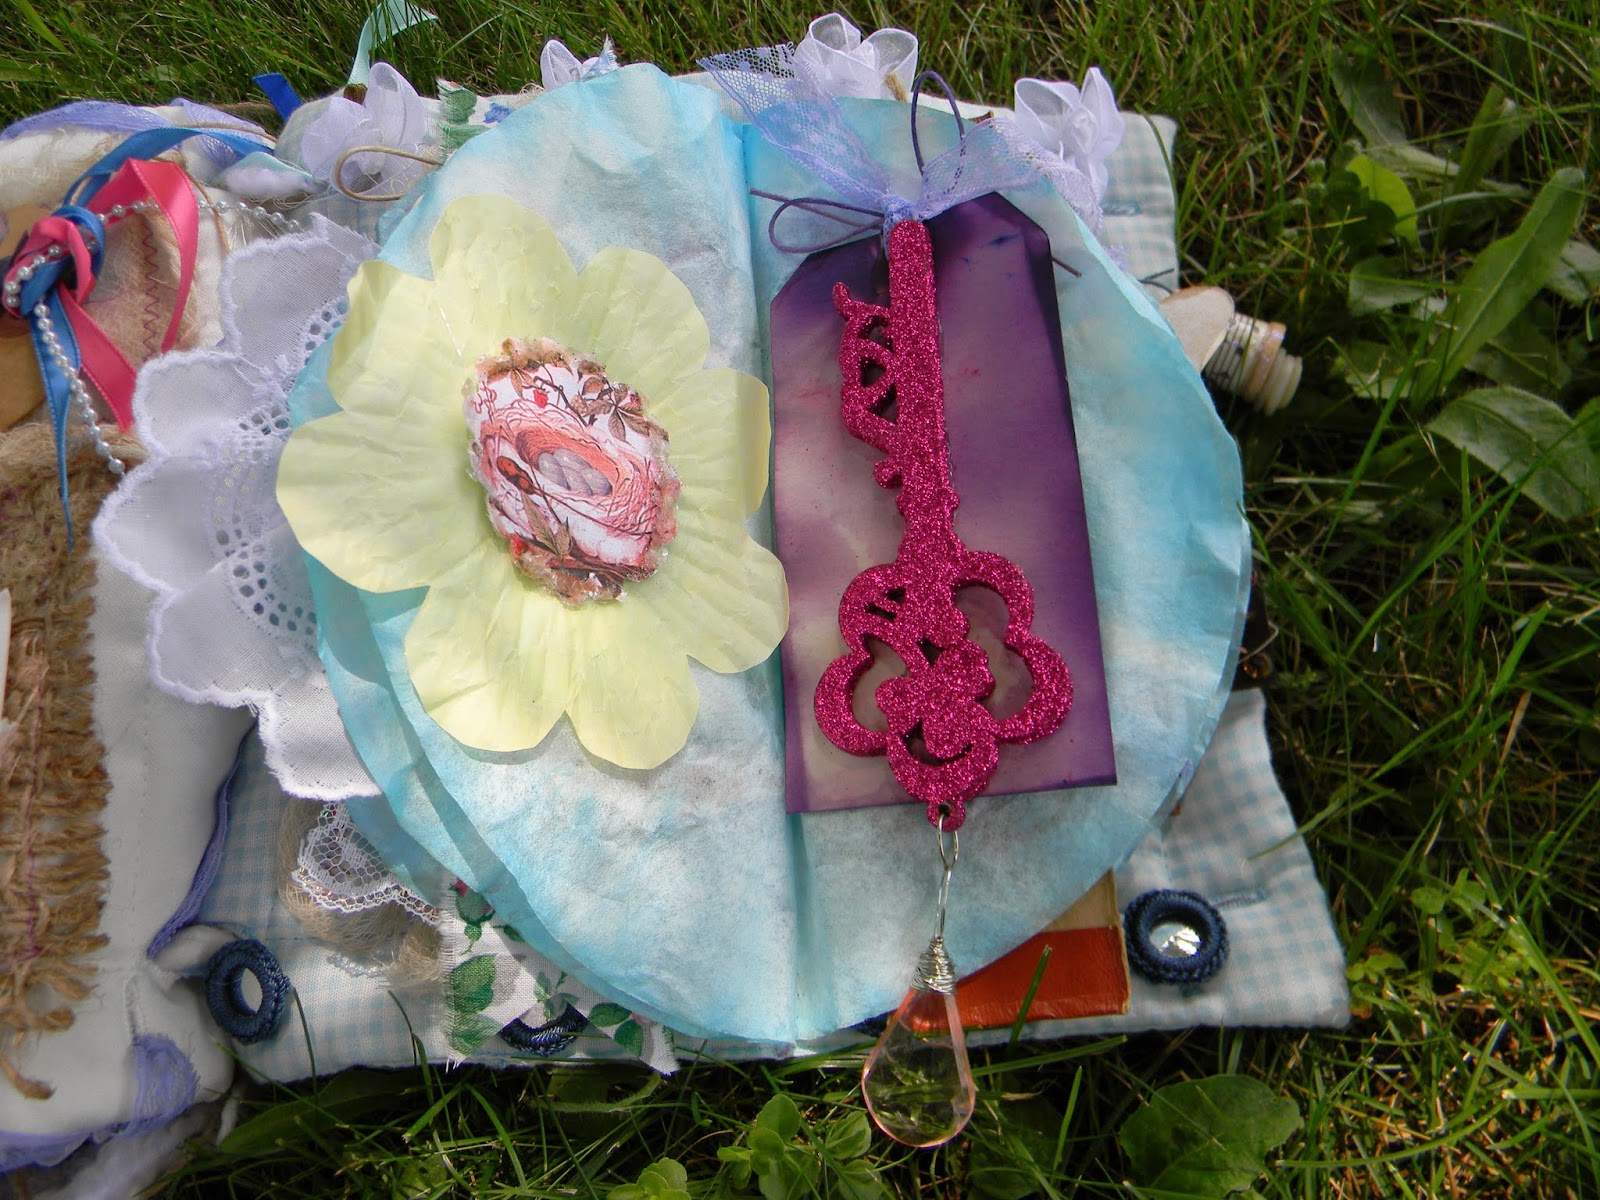
I sewed about 5 dyed coffee filters right down the middle of the page.

That creates about 10 more pages on this page...

What fun!


So Let's get started....

More butterflies and cheesecloth....

That vintage picture on the right cracks me up.

It's from an old postcard and says, "I am fully occupied!"


Next page....lace and polymer flowers and more crepe paper accents.


Alice in Wonderland and a little handmade vial...

Dress forms are an obsession of mine...


I like the three-dimensional accents....


Another sweet girl and a string flower....


Cupcake liners are such a sweet accent.


I got a couple of these glitter keys on clearance but had not decided what to do with them...

Every book needs a key, right?


So much texture and fun in these pages.


A book spine with dyed butterfly wings peeking out.


This darling girl is actually on a flattened toilet paper tube.

I wanted to create a pocket for a tag.


Last two pages.


I still feel like anything is possible if you BELIEVE and WORD HARD!


A sweet little glittered spool.


On the back of the book is a coffee filter flower.


Doesn't everyone need a fabric book?


I have to say, I LOVED this project.

It took me a couple hours to assemble all the bits and pieces.

Almost every single piece (except the glitter key) was made or altered by me.

 Many things were already made and then just added.

Those jars I showed you before, hold lots of goodies...handmade and collected.

If there is anything you saw you want to see a tutorial on later, just let me know...either in the comments below or shoot me an email.

Thanks for stopping by....

I will be linking up with these amazing blogs.