Showing posts with label Karen Valentine. Show all posts

Tuesday, July 22, 2014

Fabric Mixed Media Book...

I have long been fascinated and inspired by fabric books.

I love the old and shabby look of creations by amazing artists such as Viola from Shabby Chic Inspired....


and Karen Valentine from My Desert Cottage...


So with the fair coming up soon, I decided to finally tackle one of my own....

Here is the result.

I started with some quilt squares I got at a local surplus store.

  They came 4 in a pack and were already assembled as a finished square with button holes around the edges so you could easily build a quilt.

This is the cover.


I bound my book with yarn and fibers.

I cut a variety of ribbons and fibers and used a crochet hook to pull them through the button holes.

Then I tied them loosely in a knot.

The cover already had the lace as part of the quilt square.

I attached the word "Dream" by basting each letter on.

I bought the letters at the thrift store a couple years ago.

I think they are the ones you use on signs.

I cut the little tabs off with scissors.

I added a twisted satin flower and a piece of fabric that I dyed from a discarded set of curtains from my brother.


I wove an old pearl necklace through the button holes around the edge and attached a charm I made from hardware, rhinestones, one of my polymer beads, a frozen Charlotte head, and resin.


  When you open the book, you can see the first two pages....


Images from The Graphics Fairy were printed on muslin and sewn on the pages.


The other end of the pearl necklace from the front got a vintage music resin bottle cap charm added.

The secret here for the aged look resin is to use car resin which is amber instead of clear.


The letters are made from polymer clay in a push mold.


I antiqued and sealed them.

This page also has a UTEE covered book page leaf, a polymer clay music charm, a cheesecloth twisted flower, and a resin cube encasing a vintage crocheted flower and lace.


I love this cheesecloth flower...


Behind the resin cube are two white feathers.

A little polymer flower accents the end of one feather.


The next two pages are butterfly inspired.


Another great image from The Graphics Fairy.

A seashell with another image from her transferred onto it.


I love this sweet little girl.

The little blue mirrors are button attachments I bought when I got the quilt squares.


This page has a library card sewn in as well as a butterfly poem from a children's poetry book.

The library card is a pocket so little treasures can be tucked inside.

This page also has butterflies and flowers galore.


I adore how inking the edge of a die cut really makes it pop.


Staz-on ink is my favorite...

Die cuts are accented with handmade polymer hearts and flowers or frosty acrylic accents.


The twine flower is made by making twine loops and the gluing them and adding a button on top.

The trick is to make it on a hot glue release mat.

Just pop it off when it is cool.


Here are the last two pages.


The left hand page has cheesecloth and burlap sewn on and then two of my tags were added.

Cheesecloth and crepe paper are two of my favorite materials.


This little handmade chalkboard tag is so sweet.


This last page was so much fun.

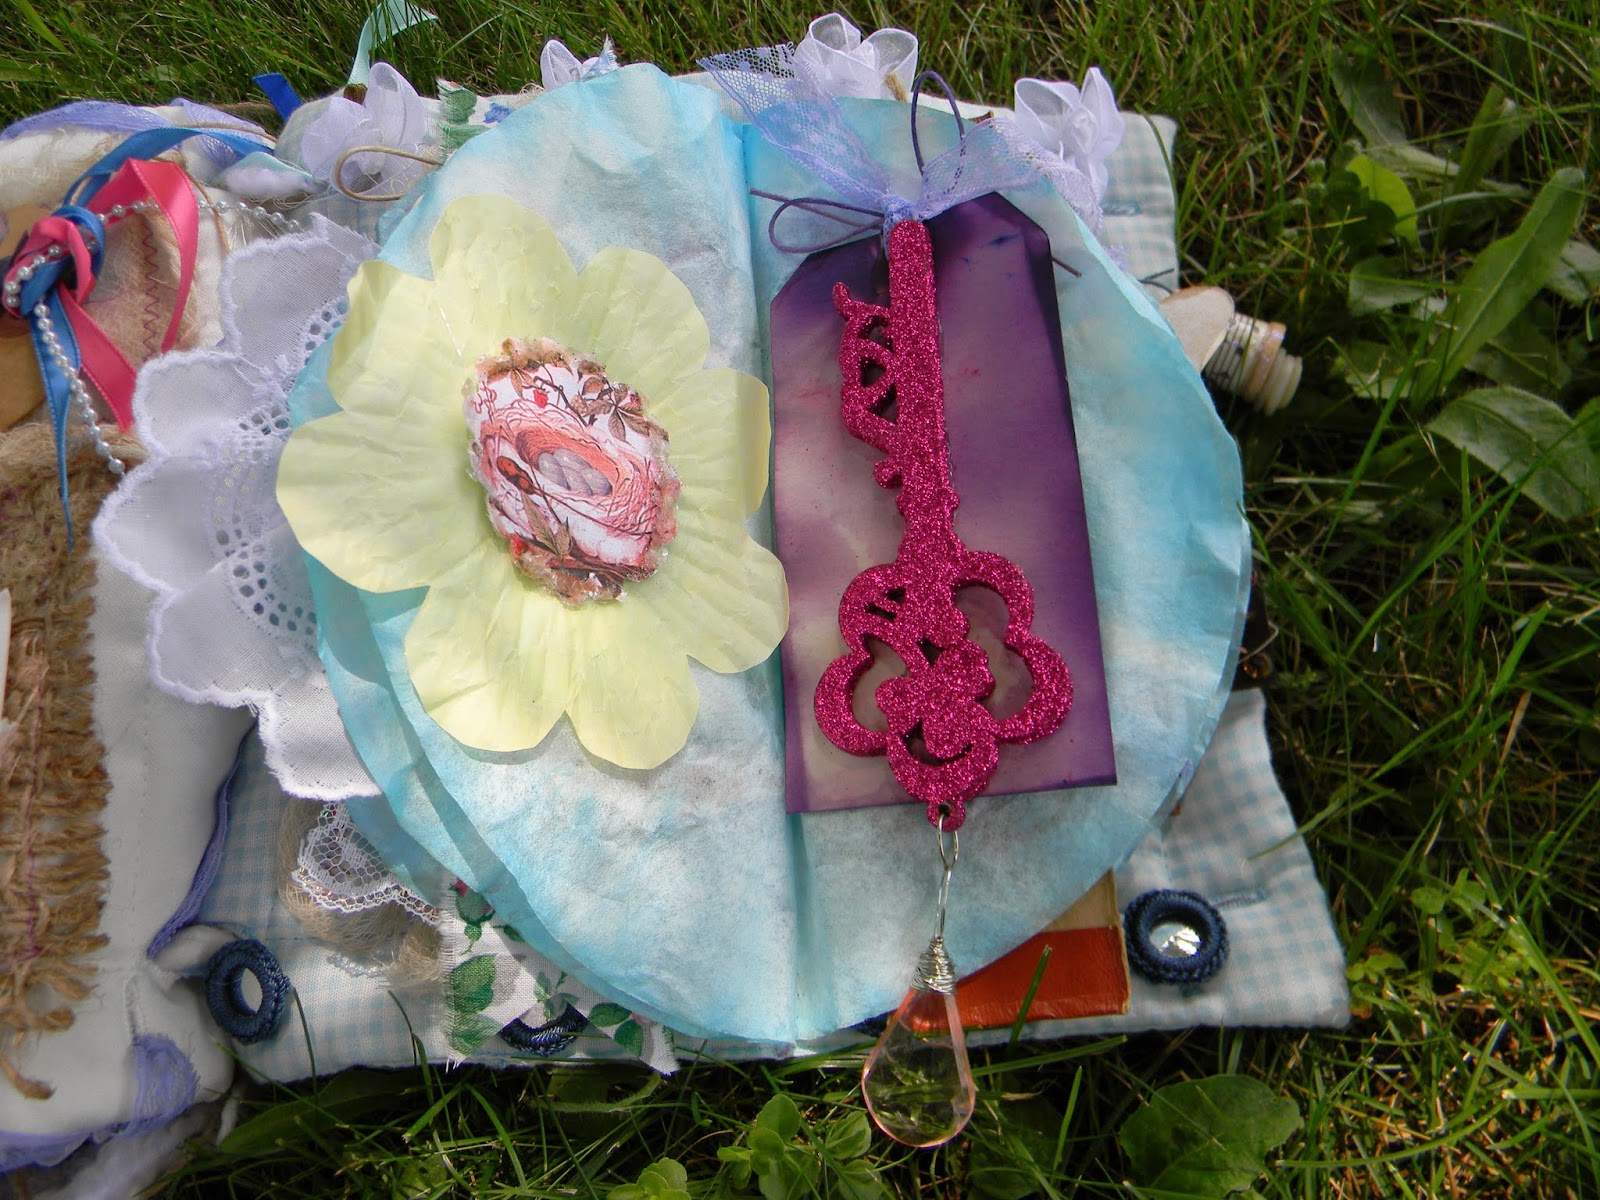
I sewed about 5 dyed coffee filters right down the middle of the page.

That creates about 10 more pages on this page...

What fun!


So Let's get started....

More butterflies and cheesecloth....

That vintage picture on the right cracks me up.

It's from an old postcard and says, "I am fully occupied!"


Next page....lace and polymer flowers and more crepe paper accents.


Alice in Wonderland and a little handmade vial...

Dress forms are an obsession of mine...


I like the three-dimensional accents....


Another sweet girl and a string flower....


Cupcake liners are such a sweet accent.


I got a couple of these glitter keys on clearance but had not decided what to do with them...

Every book needs a key, right?

So much texture and fun in these pages.


A book spine with dyed butterfly wings peeking out.


This darling girl is actually on a flattened toilet paper tube.

I wanted to create a pocket for a tag.


Last two pages.


I still feel like anything is possible if you BELIEVE and WORD HARD!


A sweet little glittered spool.


On the back of the book is a coffee filter flower.


Doesn't everyone need a fabric book?


I have to say, I LOVED this project.

It took me a couple hours to assemble all the bits and pieces.

Almost every single piece (except the glitter key) was made or altered by me.

 Many things were already made and then just added.

Those jars I showed you before, hold lots of goodies...handmade and collected.

If there is anything you saw you want to see a tutorial on later, just let me know...either in the comments below or shoot me an email.

Thanks for stopping by....

I will be linking up with these amazing blogs.

Friday, July 11, 2014

2014 Summer Studio Tour for Artistic Endeavors 101

Well, here we are.

If you have been following me, you know this has been a long journey to get to the point of the tour....

Lots of reorganizing which you can see here and also here.

I worked long and hard and celebrated little victories and clean work surfaces.

You might have been here along the way.

If so, some of this will look familiar.

My main studio space is my garage.

Not very romantic.

But it is dry and heated.

It is not far to carry things is I want to work on..

It has a lot of storage....

which is good....

because I have a lot of stuff.

Here is my main work area...


My husband bought the cupboards from an ad in the newspaper and we painted them...twice....

Because the first coat just peeled off.

So we did the necessary prep and painted them again.  

They were in my studio at the previous house.

We moved them with us when we moved.

Inside the cupboards, most things are stored in vintage mason jars...


I can easily see what is inside.

Some cupboards just contain supplies.

Resin stuff, chemicals, molds...

But I actually know what is in these cupboards....


I have a couple magnetic boards that I keep things on.  

Also, a tie rack is screwed to the wall for jewelry.

That area changes frequently. 

 Sometimes the rack is full of supplies, sometimes finished pieces waiting to be priced.


This summer I reorganized above the cupboards....

A prettier way to house yarn and fibers...


My fair ribbons are on the cupboard doors.

I already sent this year's application in...


Under the cupboard I have lights which are invaluable.


You can see the difference with them off.


Beyond the counter is a sort of alcove area.

I have to keep it clear so we can get to the fuse box.

It's a rule.


My husband helped create this awesome ribbon storage.

The wooden vertical pieces have hooks.

  We slid clear dowels through the hooks and then all the ribbon spools are on there as well.


It looks so pretty, sometimes I don;t want to use the ribbon.

Across from the ribbon wall is an old dining room buffet set from my husband's grandparents. 

 I painted it white.  

It moved with us as well.

It houses books, ribbon, paint, and lots of those divided storage boxes full of what-nots....


Here is an area I showed you before.


The curtain I made covers the chaos...

Fabric, Sizzix stuff, tools, soldering stuff, old LPs.


The printer's trays get fuller and fuller every day.  

I love having these goodies where I can see them.


The awesome industrial storage piece from Lucketts...


 As you can see from this angle, it really is a garage...

In the summer, the door is open most days.

I love that.


My other main work are is this table.

It is very seldom clean like this.

You can read more about it here.


Love this new little cupboard for often used goodies...


My newly created tiered storage is here.

You can make your own by following my tutorial.

And next to her is my transformed candlestick.


If you spin around, you can see some more ribbon stored on spring curtain rods.


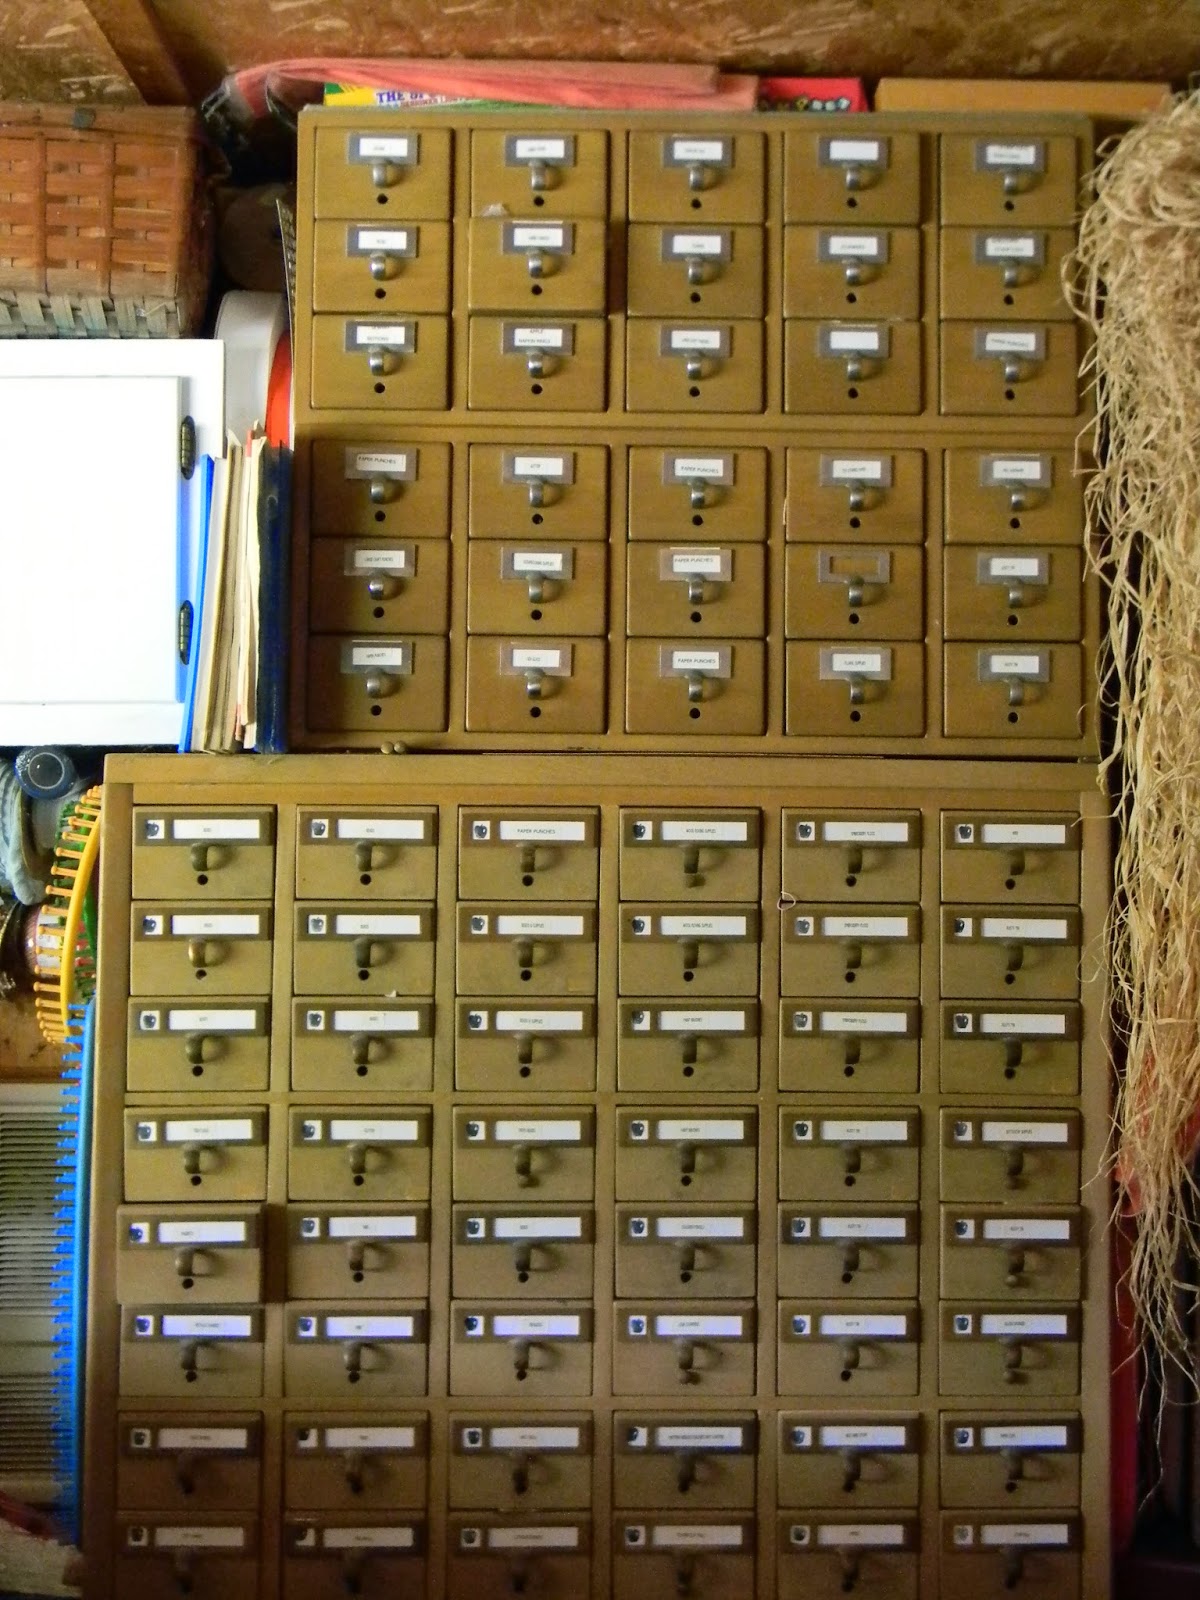
One of my all time favorite pieces in my studio is my card catalog drawers.

This is actually 3 units.  

Two on top were given to me by my husband's uncle.

I love them.


The big one on the bottom was in the Bargain Sheet.

Turns out it was only about 2 miles down the road in a guy's barn.

My husband bought it for me and loaded it in the truck by himself.

Have I mentioned how awesome he is?

I love him like crazy.


They hold a TON of stuff....

Stampers, stamp pads, felting supplies, markers, magnets, beads, glitter, etc...


They are all full...


 Next to the card catalog is another of my favorite features. 

 It is dirty.

It is grungy.

But I love it.

My utility sink.

It gets a work out every day.

Washing hands and brushes.

Cleaning pond filters.

Getting water for the dogs and the plants....

My studio at the old house did not have one so I really appreciate it.


At the end of the work table is a bookcase for paper supplies.

My husband helped with the stacking of other shelves on top to maximize the space.

He always says to go UP to gain extra storage.


The POOH curtains were from the thrift store and veil the supplies within.


On the sides, my husband added long aluminum bars for hanging things.

I use them for jewelry on this side.

The other side is ties, belts, and wire.

Each hook on this side holds specific jewelry.

One hook is to be submitted to magazine.  

One hook is back from magazines.  

Two hooks are to be priced.


The back wall of the garage has more shelves. 

Like my helium tank?

Everyone needs one....


I love my enamelware saucepans.

They just make me smile.

Your studio should have some things that just make your heart happy.


Aren't they fun?


These two posters are on my door. 

 Daily reminders.


On the other side of the door is more shelves...


 Lots of reminders that this is a garage..

extension cords, potatoes, onions, coolers....


I bet my studio has something that almost no other studio has....

Sure, some people may have a fridge...

But how about a full-size popcorn machine...?

I always wanted one.

Have I mentioned how awesome my husband is?

We got it for parties...


 and then we are back up to the front corner....

You can see more of it here.


So much stuff...

So many projects...

So little time....

Thank you for visiting my creative space...


It may not be a dream studio for everyone but it is a place where MY dreams are realized.

Linked up with Where Bloggers Create 2104...

Be sure to head over to visit all the other great creative spaces....

Thanks for stopping by....