Showing posts with label sea glass. Show all posts

Saturday, April 11, 2015

I Made the Cover!

Sometimes things happen that are so amazing, you never quite believe them....

I was going through my blog roll and was reading Knick of Time a few weeks ago......

She was writing about being featured in the newest issue of Somerset Life and had this photo:


I could not believe my eyes.

You see, I knew I had some bottles I soldered in this issue but I had not seen it yet.

I started saying, "HEY!! HEY!  I think I am on the COVER!!!!"

My husband  looked and I RAN the whole way out to the mail box.

I am not built for speed so it made my husband chuckle.

Sure enough, there I am.


WOW!!!

I made the bottles to commemorate a vacation we took with my daughter to the Bahamas a couple years ago.

I am so proud of those bottles.

Having them on the cover, unbelievable...

If you see it on the newsstand, take a look.  

The issue is fantastic as always.

Christen Hammons is always amazing.

Thank you to the wonderful staff at Stampington for nailing it again.

Thanks for stopping by....

Thursday, August 28, 2014

A Ceiling Tin Memo Board for the Dorm...

Early this summer while junking together, my daughter found this ceiling tile.

I bought it for her so she could turn it into a memo board for school.

She has scrubbed it several times with a brass brush to remove the loose paint.


I liked it the way it was but she was determined to add some color to it.

Here is the back...

It is gorgeous too.


Krylon Paint sent us the paint and sealer to complete the project.

We used the Color Master Cover Max Paint and Primer in Sea Glass.


At first she was worried she might have to go buy another can, but as she added her light coats, she liked how it was working.


You can still see some of the flaking paint looks loose.

She scrubbed it several times before painting.


She changed her angle often because there was so much texture to the tin.


I tried to take a picture after each coat.


I believe she did 3-4 light coats and let them dry 10 minutes to an hour between coats.


We set it up an a bucket so the overspray did not get all over the grass.


Once she was satisfied with how it looked ( we actually have some left in the can), she sprayed the whole thing with Krylon Color Master Clear Flat.

She is really liking the whole chalky finish look right now.

I was not sure how it would turn out, but it looks great.

Those loose paint flakes are not even noticeable now...


She took it to school with her and her Dad hung it over her bed. 


 The tile had little holes along the edge where it was originally attached to the ceiling so he just screwed it to the wood wall strip above her bed.

It looks awesome and it should not fall on her in the night....


What a great dorm decor project for my BoHo girl....


Thanks for stopping by....

Linking up with these great blogs.

Tuesday, July 15, 2014

Garden Mosaic Art Workshop

Time for another workshop with my daughter and good friend....

This time we were making mosaics....

Me, I am a fly-by-the-seat-of-my-pants girl...

Which means, I say, "Let's do mosaics!"

I have looked online and have a general idea of how to do it and materials needed.

My good friend...she's a thinker....

She does lots of research and spends a lot of time considering products and applications....

I learn through trial and error.....

Let's try this....

That didn't work out....

Hmmmm...

Anyway, here is a few snapshots of the afternoon....

I have been saving and accumulating materials to make mosaics for years....

Jars of goodies, ready to go....


Seems like I buy glass pebbles and marbles every time I see a bag at a yard sale or when they go on sale...

They were spread out all over the studio...


Pebbles, glass, polymer goodies, seashells...


Grout, a bowling ball, more shells and pebbles, a cool box to cover.

The little tile bits were reteived for me by my father-in-law a few years ago after an auction from the auction trash.


That bowling ball has been saved for this project for years....


Then my friend arrived with her stash....

My, oh, my!  

She has awesome goodies....

She LOVES blue!

Can you tell?


She has been saving dishes when they break at her house for years.

She just tossed them in a trash can in an unused part of the yard, knowing someday they would find their way to a new life...

I love that idea.


My daughter was going to join us too, but she had a couple of things she was going to work on: finish a painting, a rag rug she is making, a couple new paintings.

When she saw all those awesome supplies get unloaded, she decided to mosaic with us.

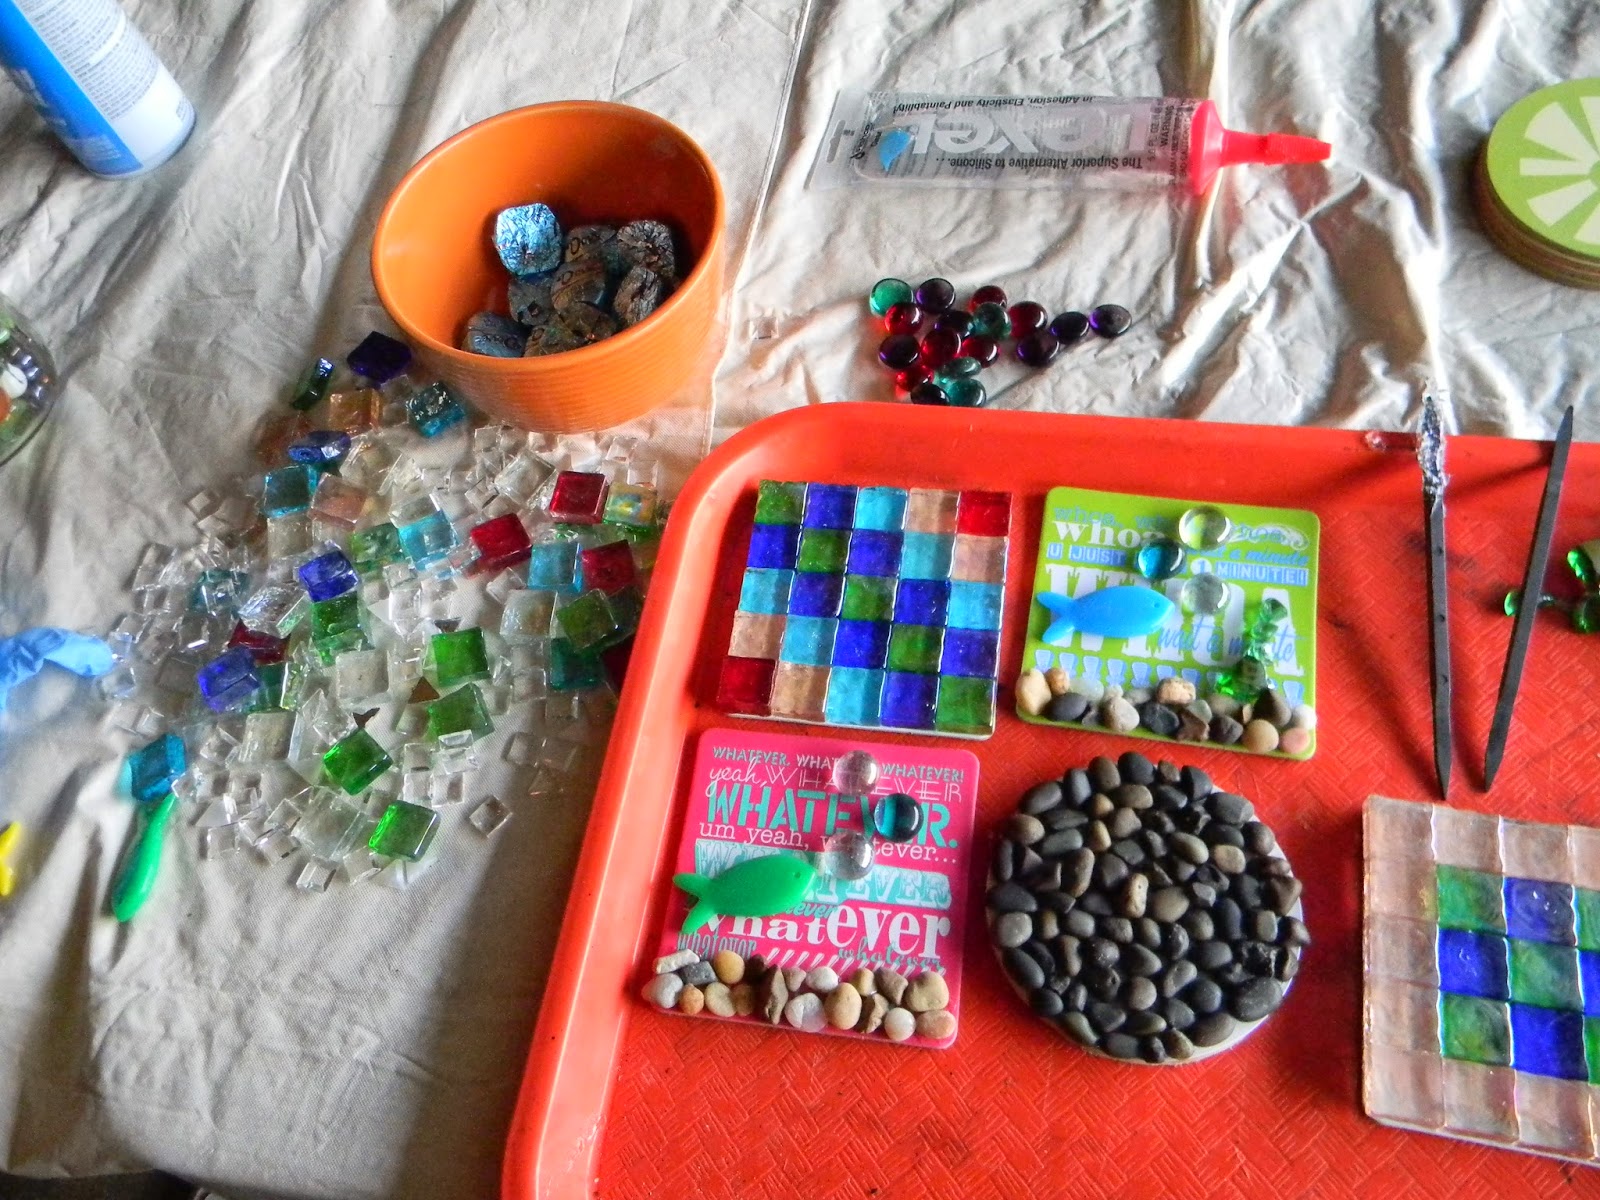
She was going to make coasters.

I pulled out some cheap cardboard coasters I had.

I think that was a great idea.

She got to play with different supplies and apply them to a small project.

Note the bowl of chocolate again...


Here are some of her designs.

We have to grout next time.


Once she grouts, you won't see the coaster background.


I love these.

She made a set to give as a gift for Christmas...


My project for the day was to transform this satellite dish.

I have been saving it since we moved into the house.

Sorry Direct TV.


First it got a coat of spray paint since I was using clear adhesive to attach the pebbles.


I am not a pattern/exact person.

So, this was quite an undertaking for me.

I really enjoyed it though.


That's a lot of little pebbles.


My friend brought a mirror frame she wanted to cover with seashells.

She removed and left the mirror at home.

I am loving what she has done so far.


Those pearls and bits of sea glass really made it pop...


Later this week, I will show you what my daughter and I added to the projects.

We are all getting together this week to grout so I will show you finished projects later.

I will also do a post on tips and tricks for doing mosaic....

Thanks for stopping by....