Showing posts with label coffee. Show all posts

Monday, June 29, 2015

Making your Own Polymer Clay Stamps/Molds

One of my favorite recent projects was polymer clay related.

While I was playing with the silicone molds, I made some molds and stamps with my own designs.

First I made a small sketch of what I wanted for the design with pencil.


Next I rolled out a little slab of clay.  
I laid the design down on the clay and burnished it with a ball tool to transfer the design to the clay.

Then I used my clay tools to  trace and make the design.

I decided not to add the word to this one.

Doing it backwards on the design would make it backwards once stamped.

Bake your mold in your toaster oven according to the manufacturer's directions.


Then I began stamping away.


You can use your stamp over and over again.

You will notice, however that the stamp starts to soften a bit as the mold absorbs some of the oil from the clay.

No worries.

Just pop the mold back in the oven with your next batch of beads and you are good as new.


My daughter wanted me to make her a thresher shark.

So my husband found an outline online. 

 I could not shrink it enough with my computer so I had to make my own sketch from it.  

You can see my erased first attempts.


I followed the same process for transferring the design and tracing the shape.


My daughter has not seen these yet but I like the way they turned out.


I hope she does too.


Next I wanted to play with just different textures.


It is not my favorite, but I do like the idea.


I can utilize different parts of the mold depending on where I press the clay on it.


I saved my two favorites for last.

I did a tree.

I love how they symbolize life and family.


I intentionally tapered the edges of the mold down towards the table.

Check these out!

How cool are they?
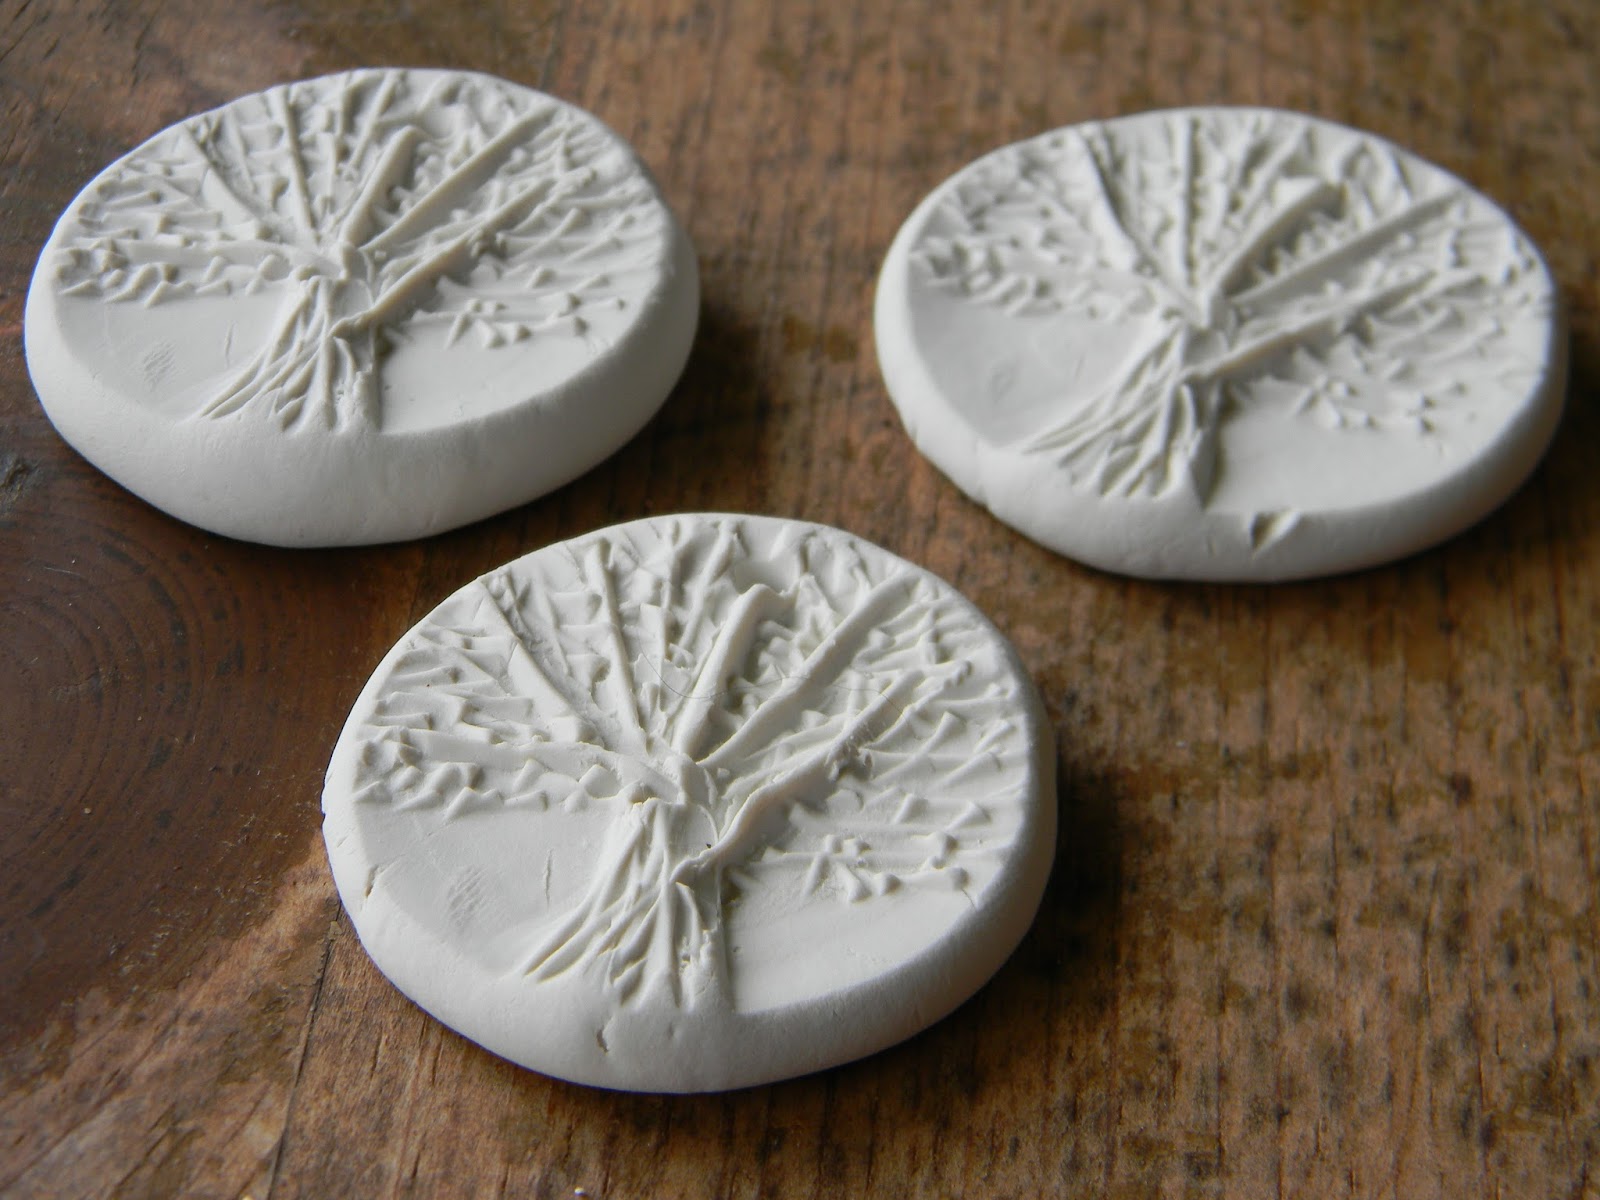

I made a ton of beads and pendants from the tree mold.


I ended up making bigger ones for pendants and smaller ones for possible earrings.


My favorite mold was actually the first one I made: a nest.

Also a symbol of family, birth and renewal.


There is something so satisfying to seeing designs come from something that came originally from your own head and hands.


I could not get enough of playing with this mold.

Big chunky pendants...

In a variety of shapes.


Some pieces that I gently curled up to be three dimensional nests.


Some with bails...


Some just the eggs....


I can't wait to start playing with the finishes.

Thanks for stopping by....


Sunday, February 8, 2015

Grubby Snowman Ornaments


Are you keeping up with the ornament ideas I am sharing each month?

Not to worry...

I will do a great round up post before Christmas in case you have missed any.

Today is a sweet Grubby  Country Snowman.


Believe it or not, this little guy starts with a couple white pom poms.

Use a glue gun to glue three together in a snowman shape.

Paint a toothpick orange.

Snip off the end and glue it in the top pom pom for a nose.

Add two black beads for eyes with the glue gun as well.

Mix some white school glue, water, strong coffee and ground cinnamon.

Put on a pair of latex or vinyl gloves to protect your hands.


Roll the snowman around in the glue mixture and sqeeze it into the pom poms.

Squeeze to remove excess glue.  

Lay on a plastic tray to dry.  

I usually wait overnight and then turn them and let the last side dry completely.


Tie a little strip on for a scarf and glue a button on as well.

For the string hanger, I use crochet thread and a needle to pass the string through the snowman's head.

I cut the string and tie a knot.

I also make a variation with one large pom pom.


It makes a cute snowman head ornament.

The nose is made from orange Sculpey clay this time and the eyes are bigger half round eyes.


I add a little garland around some for a halo.


I use the same method to add the string to hang it.


I usually make a whole pack of pom poms at a time.

I just change the details for each one.

Thanks for stopping by...

Monday, October 20, 2014

Coffee Filter Wreaths


I love materials that are unusual or unexpected.

A very versatile and affordable craft material is coffee filters.

They are fabulous and fun.

I love them for wreaths...

The finished product is very lightweight which makes them great for hanging.

Today I just wanted to share a few of my coffee filter wreaths. 


Many of them I use RIT dye to color.


You can see my RIT Studio here.

This sweet pink oval wreath is a great accent.


You can find the complete instructions here.


Those basic directions can be used to create a variety of wreaths and projects.


This heart wreath uses the same directions but I cut the base shape from a large cardboard box.


 I used 14 flowers and really pushed them together to get a very dense look.


These make a great Valentine's day accent.


They would also be perfect for a wedding...


When I cut the base shape from cardboard, I wrapped it with scrap fabric strips that I also dyed.


If I hang it on a door or window, the back looks almost as nice as the front...


The great thing about the coffee filters is the variety of colors you can achieve with the RIT dye.


The next wreath color was achieved with a weaker Fuchsia dye bath that I added coffee to.


LOVE IT!!!


The following wreaths were done by coffee dyeing the filters.

You could also just use the unbleached filters.

It would be less work but I like the look of the dyed one.

This round wreath uses the flower method again.


This heart wreath does not.

I took each filter and folded into fourths and then twisted the point like I described here in my Rose Banner Tutorial.


I usually do a huge stack of them while watching tv.

I just toss them into a pop-up laundry basket that I can take to the garage/studio when I am ready.

The base for this wreath was cut from a piece of newspaper and then traced on a cardboard box.

You could use foam core too.


I just started at the top in one corner and glued them on, adding as I went. 

The little twisted point of the coffee filter gets stuck in the glue so your fingers don't get burned.

The wreath below is a favorite. 

I like the rectangular shape.

I donated this one to a local cause for a fundraiser.


I will have to make another one to keep.


Last, but not least, are a couple book pages wreaths that I used the coffee filter flowers for the center.


These are all over Pinterest...with good reason.

They are fabulous.

I am careful what kinds of books I use for the petals...

Only damaged and discarded books.

Very often, Reader's Digest books. 

Seems like no one wants those and they end up thrown away.

I can't let that happen!

So I rescue them from the trash and "to be recycled" bins...


They are simple to make.

Remove book pages.

Twist each into a cone and secure with clear tape.

Then staple about 1 inch from the tip.

I also do this while watching tv.

I fill that collapsible laundry hamper and then I go out and make as many wreaths as that many pages will complete.


At first I used a round shape for the base but I learned to just use a piece of rectangular foam core.

For the large size, I use a quarter sheet.

I sketch rounded corners on the foam core and use that for the base as I am gluing them on.


MUCH easier than measuring, cutting, etc...

This smaller one uses a 1/8th sheet of foam core.

And then I just finish it off with a coffee filter flower.


What common material do you use in unusual ways?

Thanks for stopping by...

Linking up with these blogs...