Saturday, February 7, 2015

A Review...DecoArt Chalky Finish Paints...


This post was originally slated for this summer but never made it out of the draft folder.

I love these paints though and wanted to share the post with you today.

I am a DecoArt Helping Artist.


I have used DecoArt paints for about 20 years.


I have always thought they were the best quality, consistency, and pigment at a reasonable price.


This summer I ordered some of the Chalky Finish paints to try them out.


My experience prior to that with chalky finish paints were with those I mixed myself.

And while I love my homemade chalk paints, this was different.

These are so creamy.

I ended up painting everything on my workbench that could use a little paint.

These hat boxes have been in every craft room I had for the last 20 years.

This summer when I was cleaning the studio, I almost got rid of them because I was tired of the floral design.

I brushed 2 coats of Chalky Finish paints on them and now I am in love with them again.


Even the first coat has great coverage.


Now my buttons have a happy new place to hang out.


And I like that you can still see the old pattern inside.

I painted  them in different colors.


While I was waiting for each coat to dry, I looked around the workbench and saw the pretzel container of bottle brush trees.

Usually I just turn the label to the back so I can't see it, but there was still paint on the paint brush, so I gave the label a few coats.


Then I did my other one too...

Hmmmm...

How about those little peat pots...

 I showed you how they turned out, but here is where they got started...


This jewelry box was originally headed for the thrift store.

I bought several jewelry boxes full of jewelry this summer at my favorite flea market.


While my brush was still loaded with paint, I decided to give it a chalky makeover.


I love the new pale chalky pink.


I left the inside with the original colors and pattern.


With it's new chlky finish, it is cute enough to be a keeper...
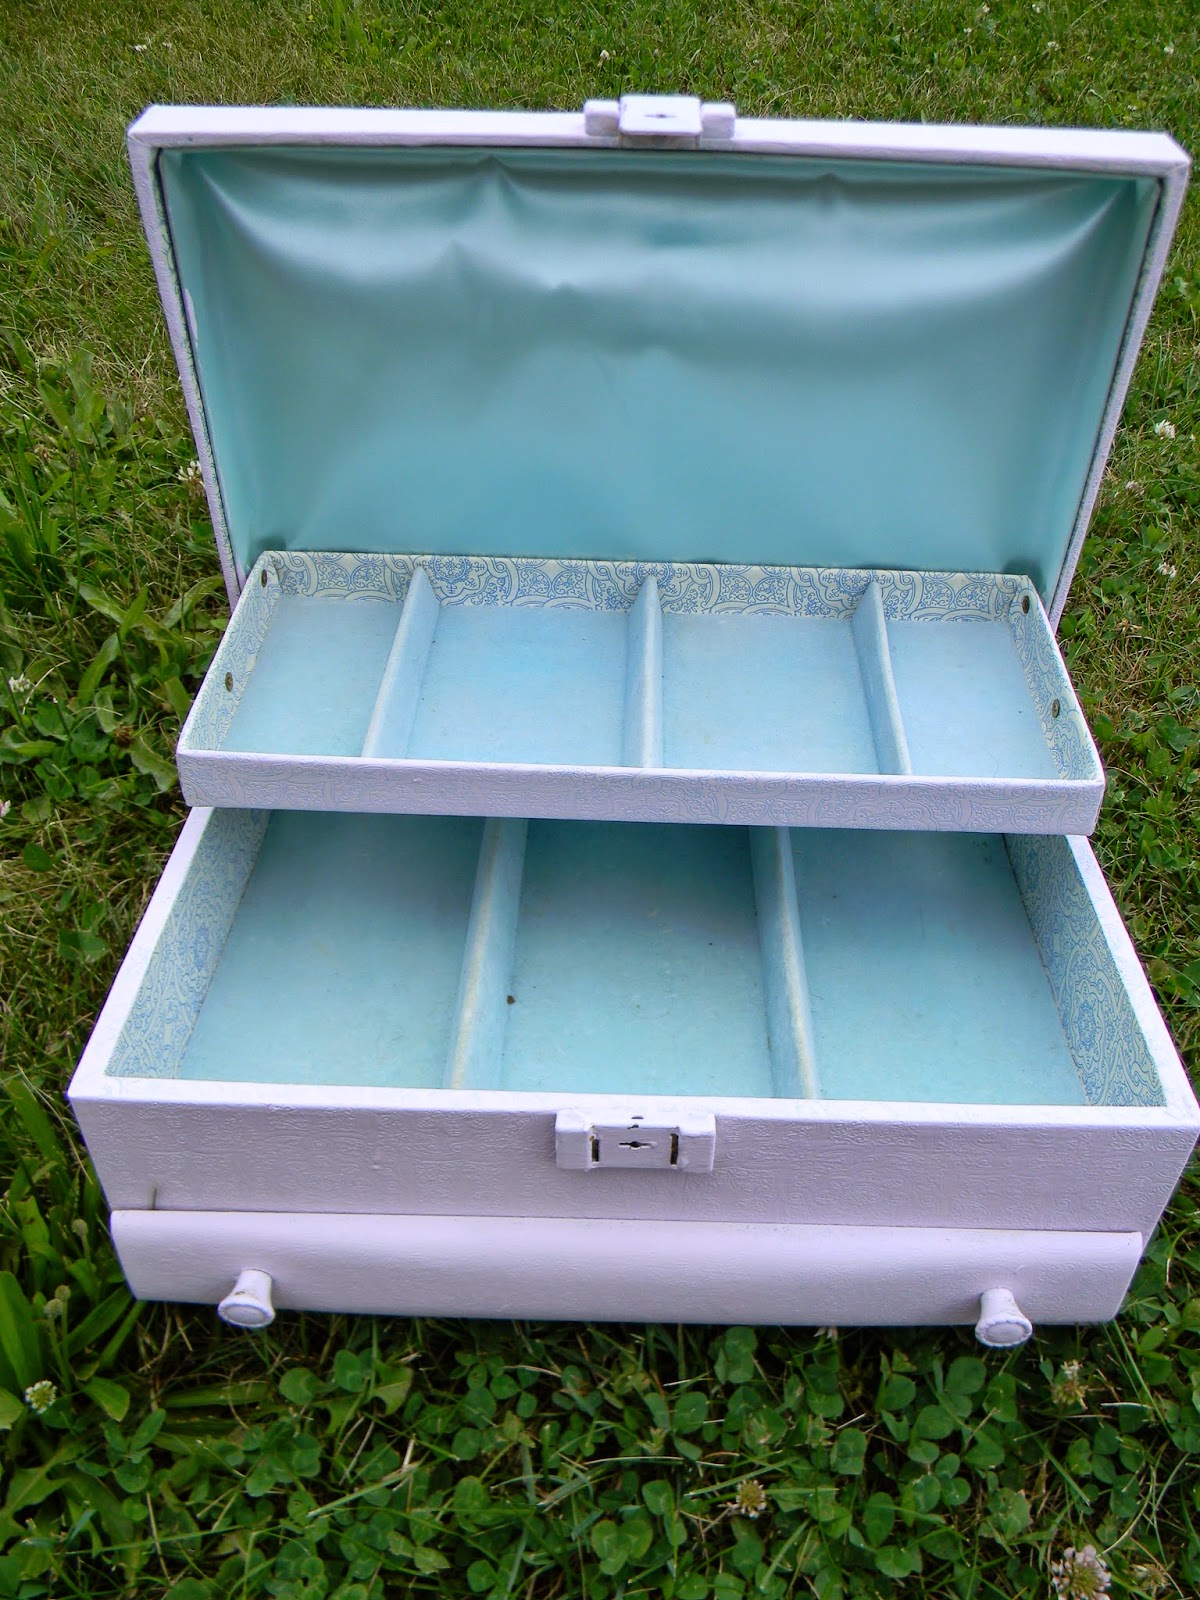

I strongly recommend these paint if you have not tried them yet.

They have a great consistency, super coverage and a great array of colors.

Thanks for stopping by...

Friday, February 6, 2015

Cinnamon Stick Tree Topper

Time to share another ornament.

Are you creating as I am sharing?

If you are, you will be ready December 2015 with lots of ornaments for your tree or gift giving.

Today is a bit different.

This is a tree topper.

I could not reach the top of my little outdoor tree so I took pictures among the branches, but it is a tree topper.

This star is made from cinnamon sticks, raffia, some wire and a pinecone.


You will also need a hot glue gun, glue sticks, and a hot glue mat.


Arrange your cinnamon sticks in your desired pattern on your hot glue mat.

I used a variety of lengths.

Once you like the pattern, add hot glue to the center.

I added lots so it got a little messy.


Before the glue cools, add your pine cone to the front.

This helps camouflage the glue and makes a pretty and natural center.


I almost forgot...

Add a long piece of heavy wire to the bottom of the star before the glue hardens.


You can bend it around a cylinder or cone shape first.

If you forget, it can be done after but it is more difficult.

 Let the glue cool and harden completely.

I usually wait at least 30 minutes.

Peel it off the mat.

To cover some of the messy glue, I wrapped raffia around the center.

I used several strands and left the ends long.
 
I just tied the ends in a knot to secure.


It has such a great natural look to it.


I think these would be fun on small outdoor trees as well.


Imagine trees decorated for the birds with these on top....


Thanks for stopping by....


Linking up with these great blogs...

Wednesday, February 4, 2015

Flower Bead Necklace

This post originally appeared on Darice's blog Live. Love. Craft.
 This versatile bohemian piece uses waxed linen cord and some amazing ceramic, metal and stone beads from Darice.
DIY-necklace-Darice

DIY NECKLACE SUPPLIES:

DIY-necklace-Darice
Begin your DIY necklace by unwrapping a length of cord that stretches about 6 feet.

 Fold it in half.


DSCN6464
Pass the folded end through the smaller side of the S hook.

 Pass the two cord ends through the loop and pull tight.

DSCN6467DSCN6469
For extra strength, repeat this step.

 Slide one black stone bead onto one of the waxed cord strands.


DSCN6473
I pull the center cord tight and then wrap the outside cord along the bead and then tie an overhand knot.


DSCN6475
Because the silver bead is next and has a larger hole, tie another overhand knot to make it too big to go through the bead hole. 

Next thread a silver bead onto both waxed cord strands and tie an overhand knot.
DSCN6480
Tie another knot on top of the first.

 Slide one black stone bead onto one of the waxed cord strands.

 Repeat knotting process for black bead.

DIY-necklace-Darice
To thread a red ceramic flower bead on next, pass each end of the thread through the hole but come in from opposite sides.


DSCN6484
After they go through the center, tie an overhand knot on the other side of the flower bead.


DSCN6491
Repeat the directions so the pattern continues: black bead, silver bead, black bead, red flower bead.


DIY-necklace-Darice
Continue until the beads are all used or the cords are about 4-5 inches long.

 Once you have 4-5 inches of cord left, you can tie the silver ring to the cord ends by threading the cord through the loop and tying overhand knots tightly.

DIY-necklace-Darice
Trim ends. 

To add extra length if needed, you may add several silver jump rings.


DSCN6497
This DIY necklace uses three of the methods I use most often for knotting beads with waxed linen cord: 

both stands through,
 one strand through, 
and crisscross through the center.

 With these basics mastered, you can use them as the beads demand or your imagination requires.
 

Have fun and enjoy!
Thanks for stopping by...

Monday, February 2, 2015

Bohemian Memory Wire Bracelet


This post originally appeared on the Darice site Live. Craft. Love.

I am a long-time fan of their products.

I want to share a simple fast bracelet that looks high end, but could not be easier.


This versatile bohemian piece uses memory wire and some amazing beads from Darice.

You will need:


Darice 1984-52            Wood bead strand 8mm
Darice 1984-58            Wood bead strand 12mm
Darice 1999-968 Round Green Red Unakite 10mm
Darice 1999-4044        Natural Turquoise Rondelle 4mm
Darice 1999-209          Gold Stone beads 8mm
Darice 1999-217          Turquoise Round stone beads 10mm
Darice 1999-4841        Wood Bead strand button 12mm
Darice 1999-5517 Painted Aqua/Gold 12mm
Darice 1962-92            Continuous Bracelet memory Wire
Darice SS-135   Jewelry Tassels-aqua and blue
Darice Needle Nose Pliers
Darice Wire Snips

Begin by using the needle nose pliers to make a loop at the end of the memory wire.


This keeps the beads from sliding off the wire while you are adding them.

You may add the beads any way you like.


I added some of the 1984-52Wood bead strand 8mm, 
1999-5517 Painted Aqua/Gold 12mm,
1984-58       Wood bead strand 12mm,
 1999-968 Round Green Red Unakite 10mm,
 and 1999-4044 Natural Turquoise Rondelle 4mm.

You may add more or less beads to suit your own style.

When the first bracelet looks like you want it to, use the wire snips to cut memory wire about ½ inch longer than the last bead.

Use the needle nose pliers to make a loop in the end of the wire.


Use pliers to open loop slightly and add a turquoise tassel.


Repeat at other end.

Viola!

Ready to wear!


You have plenty if memory wire remaining so you can make more bracelets.

I made another bracelet using: 
1984-52Wood bead strand 8mm, 
1999-4841 Wood Bead strand button 12mm,
 and 1999-217 Turquoise Round stone beads 10mm.

Repeat directions for making loops at the ends and enjoy.

Memory wire makes beading a snap and choosing your accessories even easier.

Darice also carries memory wire for necklaces and rings and pre-cut bracelet memory wire.

Have fun and enjoy!

Thanks for stopping by...

Linking up with these great blogs.


Sunday, February 1, 2015

Grubby Primitive Hearts for Your Valentine's Day

I think most people have a defining style...

Contemporary...

Modern....

Primitive...

Country...

Cottage chic...

Funky....

Up cycled...

When you see their work, you know immediately that it is them.

I am not sure if this is true of me.

I like all the styles listed above and make things that fit all of those categories.

My daughter describes what we do as "eclectic".

I think she nailed it...

So today I wanted to share these sweet primitive hearts for Valentine's day.

I have made them for years but I still love them.


I start with inexpensive muslin.

Draw your desired heart shape on a piece of card stock.

Cut it out.

Trace the shape on a doubled piece of muslin.

I usually do a whole bunch at the same time.

Use your sewing machine to sew the shape.

Leave about an inch open to stuff it.

Cut out the heart and turn it right side out.


Stuff it with polyfil.

Hand sew the opening closed.

Then comes the fun part.

Paint the fabric with latex or acrylic paint.

I like to buy oops paint wherever they mix paint. 

 This used to be very inexpensive.

That is no longer true in my area.

It is still cheaper than having your paint mixed and if you find a color you like, you are lucky...

While the heart is still wet, roll it in a pan of ground cinnamon.

Set it to dry.

Once it is dry, brush off the loose cinnamon.


Add a little homespun strip and embellish.

I like to use naturals: cinnamon sticks and rose hips are favorites.

Then you can fill a bowl or send them in an envelope as a sweet surprise for someone you love.

You can also paint them with other colors before you roll them in cinnamon like the brown one below.


A little primitive love for you this winter day...

Thanks for stopping by....