Showing posts with label wedding decor. Show all posts

Sunday, August 31, 2014

A Dress Form from Old Chicken Wire...


A couple years ago, I saw some ghostly dresses for the lawn made from chicken wire.

They were enchanting and I was totally smitten.

I have wanted to make some for two years but have been worried about how hard they might be to shape and form.

A couple weeks ago, I was cleaning an area I call "the annex".

It has an old truck camper that I am planning to use as an alternative studio.

It is behind my round two-story shed and has a workbench.

It also has storage things like bricks and rocks and cans with Christmas decor for outside like lights and wreaths and garland.

Under the camper was a roll of chicken wire we removed from the chicken enclosure after the chicks were full grown.

I clipped off a length and started to fold the ends over to make a cylinder.

Then I squeezed and pinched the wire to make my first chicken wire dress form.

I was in love.

I made 2 more from the length of chicken wire I had.

  I turned 3 basic shapes out in about 30 minutes.

Here is one.


Once I made them, I was not sure how to display them.

My brilliant, artistic friend suggested tomato cages...

PERFECT!

Two of them  were stacked so the (normally) top ring rests on the ground for stability.

Then the other one is turned over so the 3 prongs/stakes are touching the other tomato cages'  prongs/ stakes.

Then the prongs are bent to lock the cages together.


This one is sort of ghostly.

She is hard to see with the vegetation behind her.


If you look close here, you can see how the chicken wire ends from one side bend over to lock on the wire.


Another photo so you can hopefully see better.


I have not "dressed" her yet.


I am thinking I want them in my flower beds as surprise focals...


This sweet girl is dressed.


I bought two tutus a few years ago at the thrift store.

They have been hanging in my laundry room since then, waiting for inspiration.


I think I found the perfect place for this one.

I wanted to accent the bust line with some flowers.


First I tried gluing them on with hot glue. 

 Not good.

So I pulled them off and glued them to a strip of fabric.

Then I used more short strips to tie it to the dress form. 

 I tied one strip between the flowers.


That worked better and I can remove it when I am feeling like giving her a change...


Then I tied a scarf around her waist.


The tutu has a bottom like a pair of underwear so I just slipped that over the base of the chicken wire dress form.

Then she sits down in the tomato cage and the tutu over the top holds her in place.


And then there is this sweet girl.


She was actually the first one I dressed.

She got a skirt from some sheets I tore in strips this summer.

I just tied a long strip in each hole along the bottom of the form.

Then I tied short ones in between.


She, too rests on a tomatoe cage base. 

 Her skirt is long so she needs a tall base.

I wanted to give her a flower accent too, so I made a little rose from stained cheesecloth.


I glued a piece of lace on the back so it can be tied on or taken off.


Here she is taking a little swing.

I think she would be awesome, hung with fishing line from our curly willow tree. 

 She would look like she's floating and dancing in the breeze.


For the post, I moved her all around.  

Below she is in our wildflower strip.

We planted wildflowers each year for three years in an area where we could not mow.

Every year, it looks a little different.

I love it though.

It takes no upkeep and I pick lots of flowers for the fair and bouquets from here.


I just love these girls.

I could not be happier with how they turned out and how easy they were.


You can tell from the photos that I have not decided on the perfect place for each of them yet.

So they live in my garage right now.  

I am not ready to put them outside permanently and let the elements take their toll.  

Maybe next summer.

I am thinking you may see some more this fall dressed for the season....

Thanks for stopping by...

We will be joining these great blogs...

Thursday, August 14, 2014

DecoArt Chalky Finish Paint for Glass...

This summer I got some Chalky Finish paints for Glass from DecoArt. 

 I was super eager to try them out.

Last summer I painted some jars with just regular paint and they did not turn out just how I wanted.

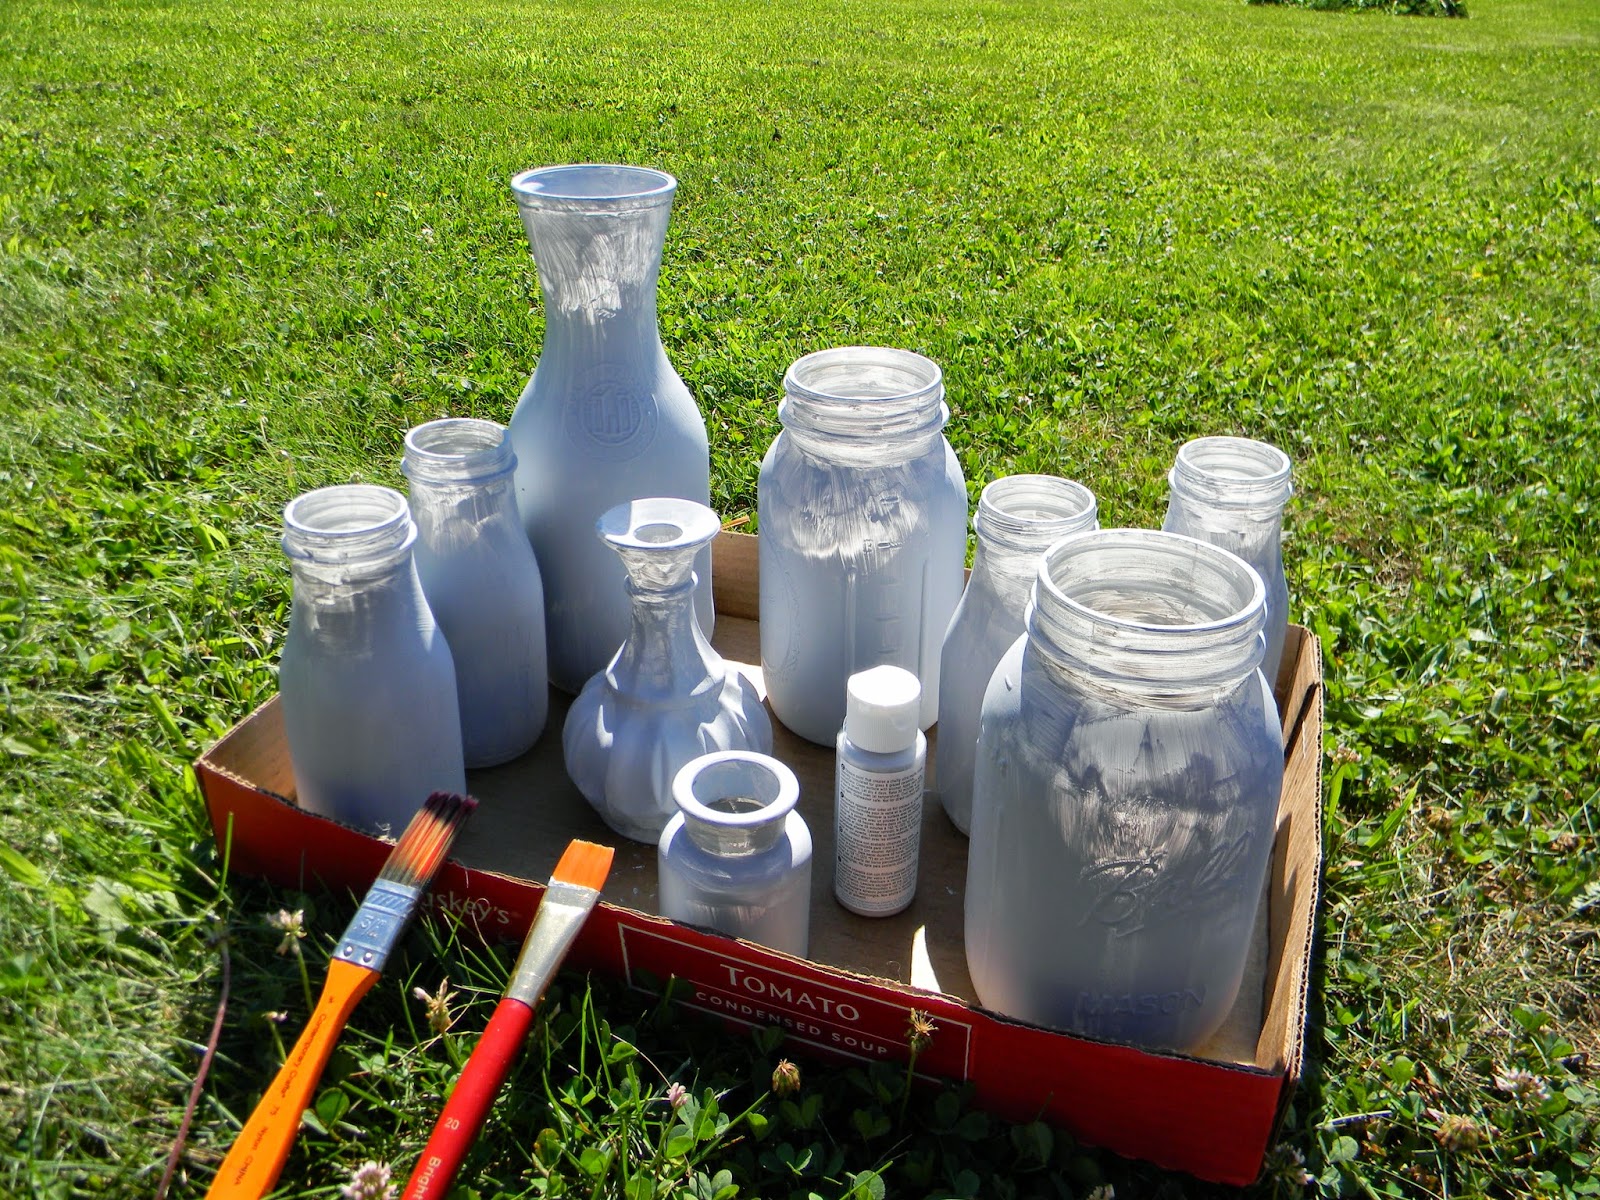
So I assembled a few bottles and jars to coat with the paint.


As suggested, I wiped each clean bottle or jar with alcohol.


Then I started painting the bottles.

The first brush I tried had bristles that were too coarse.


So I switched to this one....

Much better.


The paint went on relatively smoothly.

You can see here that I did not cover the tops as well.


I did a whole bunch with the same color because I wanted to see how far one bottle would stretch.


You can see I did 9 bottles of varying sizes.

 This one little bottle is still almost half a bottle full.


I allowed them to dry and realized I had a cool mistake.

I removed the stickers from the Frappuccino bottles before they ran through the dishwasher.

But all the sticky residue did not come off with the washing or the alcohol.

Where the residue was, it crackled...

Which I loved!


I did go ahead and put a second coat on 4 days later to cover the areas where it was splotchy before.

I did NOT put a second coat over the crackled area.


I had also done some of the Chalkboard Paint for Glass by DecoArt on some bottles too.

I waited another four days.

I heated them all in the oven on two separate cookie sheets.

It did smell sort of bad but I had the house windows open...

  It seemed to be the chalkboard paint bottles that smelled the most.


I used these to take flowers to the fair.

It is easier to find all our entries if they all look the same.

Check out the repainted tote.


The herbs look a little sad.

This is after the fair.


I love the chalky finish on the grey bottles.

Some of the paint did chip off of them by the time we got home from the fair.

I am not sure if that was because I did something wrong.

Or if they bumped together too much in the car on the way there and back...

In either case...they turned out much better than last year's experiment with regular latex paint.

This would be fabulous for DIY wedding décor.

One little bottle of paint did those nine bottles in a variety of sizes.

With 2 coats each.

I have to say, though, that the Chalkboard Paint for glass was my favorite....


I love those bottles...

  I can't wait to use it some more!


Thanks for stopping by... 

Saturday, July 19, 2014

More garden Mosaics....


I shared with you that my daughter and I continued to mosaic after our last creative workshop.

We got a little obsessed with it for a few days.

I wanted to show you what we worked on.

I finished my satellite dish transformation.

Remember how it started here.


Now it is almost completely covered.

Since it is not perfectly round, there are a few spaces that did not get covered.


This was a wooden box.

I covered the lid and will paint and spruce up the inside.


This is one of my favorite projects.

Old bottles from the recycling bin.

Covered in marbles.


A marble to seal the top so water won't get in if they are left outside.


Remember, nothing is grouted yet.

More bottles.


Each bottle has a strip left bare down the back.


When I grout, I am going to add a little something.  

You will see.

One bottle covered in buttons.


One of my favorite bottles...


Here are most of the bottles.


This plastic charger from the thrift store was transformed too.

My daughter's idea actually.

After it is grouted, it will have another step before it's new life.

Don't worry.

I will show you.


My daughter made more coasters.


Which are your favorites?

Mine are the keyboard keys.

They are so cool.

What words can you find?


My husband could not tell what this was.

Can you?


It is a bird.

Some eggs....


I think they will be fun in the garden.

Last, but not least, my friend left this little gazing ball and stand.  

I covered it in seashells.


Next I will show you how the grouting went.

We have lots of tips and tricks.

We had some issues but lots of success.

Thanks for stopping by....

Find out who we are linked with here.