Showing posts with label mother daughter crafts. Show all posts

Monday, June 22, 2015

Braided Steel Wire Bracelet


I love to show you things I make.

I love to show you the things my daughter makes as well.

She has a great creative mind.

A few years ago, the whole family was playing around with my husband's oxygen and acetylene torches.

We were cutting cans and balling steel wire.

My daughter took some of the wire and made these incredibly cool braided bracelets.


She actually did these photographs as well.


I love jewelry photographed in natural settings.

I think it makes them look magical...


That's all for today.

Thanks for stopping by...


Wednesday, May 13, 2015

Beachy Blues Necklace

I am not the only one at our house that is creative.

We all are.

My husband works his magic with wood.

And my daughter can do anything creative she puts her mind to.

When she has time, she likes to make jewelry too.  

Her style is very different than mine.

I love this necklace that she made...

So beachy and sweet.


Let's take a closer look.


This is so her.

I love it.


The hard part is her slowing down enough to have time to make some things.


Even the chain is pretty.


Thanks for stopping by...


Saturday, August 2, 2014

Dying in the Yard....


 I love that my daughter is a creative person.

She is very logical and bright but also creative.

So, she decided she wanted to make a rug for the fair.

She needed fabric to tear in strips.

I was hesitant to rip great fabric we just bought into strips when it could be used for something else.

I also did not want to go spend more money on fabric than 3 rugs would cost.

So I suggested we use some old sheets I got at the thrift store and dye them.

Such soft muslin and the price was very right.

She agreed and chose some dye colors that she wanted.

Then we spent the afternoon with her learning to dye fabric.


  She wanted blues, green, and purple.


I love her color choices.


We mixed all her dyes.

I love ice cream buckets for this. 

 They are big enough to accommodate most things I dye.

 They have lids so unused dye can be saved til later.


She tore her sheet into equal size pieces. 

She wanted light and dark of each color.

It is key to wash and wet the fabric first. 

 Washing removes sizing.

  Wetting makes sure they dye takes more evenly.


That purple was so deep and beautiful.


She worked all afternoon.

She waited 30 minutes before removing each piece of cloth.

She rinsed until the water ran clear.

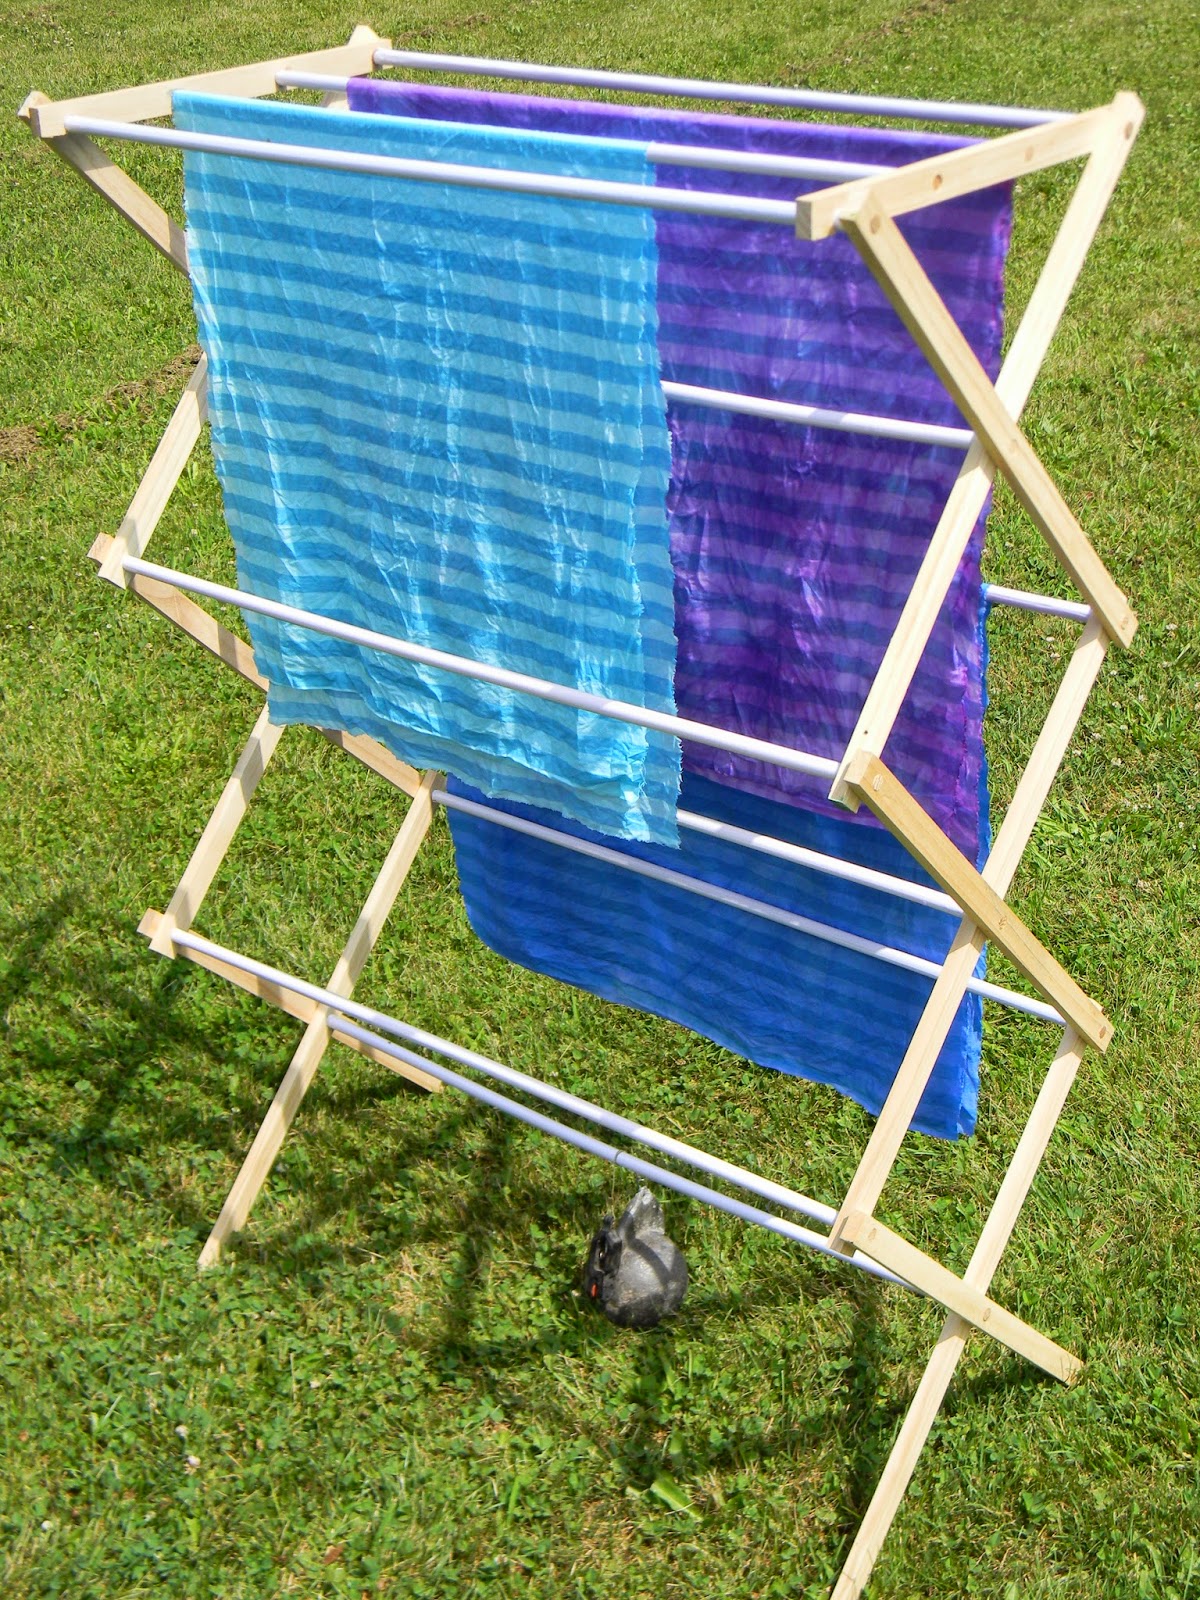
Then she hung them on this drying rack I got this spring at the thrift store.


I also found a striped sheet and she snagged that one.


It was neat to see how the stripes turned out in each color.

Note my husband's help in the picture below.

The rack kept blowing over so he hooked a very large fishing sinker to the bottom of the rack.


See it?

VERY LARGE....

Once she was finished with the dye, I dyed some things I wanted to do.

Coffee filters.


They fit perfectly in those ice cream buckets.


I leave the coffee filters in for 5 minutes or hours depending on how intense I want the color.


These were less than 15 minutes.


I put them over a tin to drip in the grass and then I hang them in my garage on a little rack by my sink.

They can stay there until they dry.

I also did a couple bags that I want to alter.


That purple is still pretty strong.

I like the splotchy look.


Then I did lace.

I recently bought yards and yards from a thrift store.


It is fun to see how the different laces take the dye in the same dye batch.

Green.


Purple.


I did lots in the purple.


You can see the synthetic lace takes the color differently than the natural fiber lace.


I love how these turned out.


Well, when my daughter gets her rug finished I will show it to you.

Thanks for stopping by....


Friday, July 25, 2014

Finished Mosaics and tips and tricks for Mosaic-ing

This post will give you some of our best tips and tricks for mosaic-ing....


If you missed them, we showed you our mosaic-ing journey here and here.

We purchased some per-mixed grout and some sanded grout that needed to be mixed.

My daughter wanted to start right away so she opened the premixed grout to use on her coasters.

This did not go well.

She was very grumpy.

It was extremely sticky and difficult to spread evenly.

She used the word "HATE" a lot.

She grouted just a couple coasters.


The excess did not wipe off either.

To tile your bathroom, I am sure it is a great grout.

For what we wanted to do, it was just not working.

In the meantime, I was mixing the sanded grout.

I had to guess water amounts since I was not using the whole bag.


The grout I had calls for it to be mixed, then set for 10 minutes and be mixed again before using.


Pretty easy to do.

The spoon and spatula were purchased at the Salvation Army specifically for crafting.

We learned this is best done out in the grass.

My daughter added the seat cushion to the work station.

It was a great idea, although our dog tried to take it from her when she got up for a minute.


I really liked mixing my own grout so I could make it thicker or thinner depending on what was needed.

Here's the charger.


And the satellite dish.


The bottles were fun.

I prefer to just wear gloves and scoop and spread the grout with my hands.

Grown up mud pies.

Maybe that was why I did enjoy it so much.


Now, a couple tricks.....

Our grout recommended letting it sit for 30 minutes and then wiping it.

I did not do this with one batch.

It got very hard overnight and required using a brillo pad to scrub away the grout over the tiles and pebbles.


My daughter also did this with a batch of coasters but she is much more meticulous than I am so hers were already pretty clean and were not too bad to wipe.


I also preferred to wipe each item 2-3 times to remove the grit.  

I let them dry completely between wiping sessions.

I sprayed my finished pieces with Krylon Clear coat for some protection from the elements.


I gave each piece 2-3 coats of sealer. 

 Now here are the finished pieces...

The Bottles turned out great!


You can see I added letters to the empty strips.


The little tabs on the letters helped them to stick in the grout.


This bottle is my favorite.


It was the only one I did with an actual pattern.


These will make great garden accents....


My daughter's coasters turned out as well.

We did learn that all items need to be the same height or the glass won't sit evenly.


I love the pebbles....


Water anyone?


These are just too clever.

They will make great gifts for her techie friends....


These actually turned out to be some of my daughter's favorites when they were finished.


  The shells are another of my favorites.


They are all ready for drinks on the porch.


Here is the funny little bird that puzzled my husband. 

 He looks better now.


I am pleased with how the eggs turned out...

They will be fun to nestle in the garden... 

A hidden surprise.


The little gazing ball my friend gave me turned out...


And the idea that started the madness is actually one of my least favorite pieces.  

Go figure.


Excuse the crooked stump.

I did not want to run around looking for a shim.


Another tip that worked for us was to put the tile adhesive in a sandwich ziploc bag.


We just snipped the end.

Just a little bit.

This was actually too much.


Then squeeze the mastic out onto the piece being covered or the item being added.

My husband's suggestion...

We did learn something about what sponges to use as well.


The one on the left did not work well for us.

The cellulose sponge (green) worked well to wipe wet grout.

The fine orange one worked perfectly for the final wipes.  

I highly recommend having brillo pads on hand as well.

I would encourage you to give it a go.

It was very fun and addictive.

Thanks for stopping by....

We are linking up with these great blogs.