Showing posts with label #polymer clay. Show all posts

Sunday, April 29, 2018

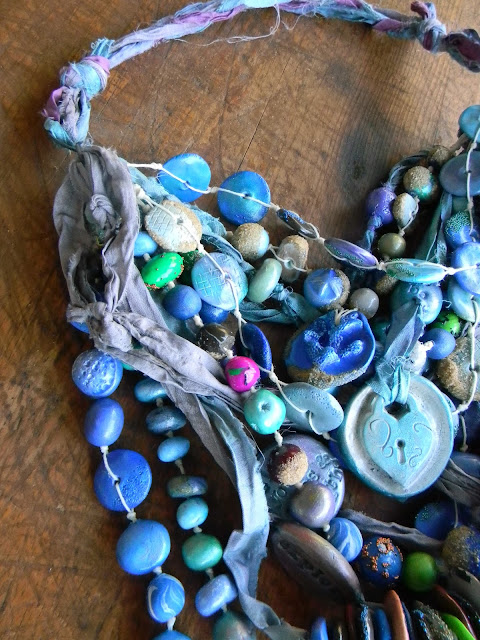
Siren's Song necklace

Time to dust off the blog...Do people still blog?  Seems like Instagram and Pinterest have taken over the world. 
I am dusting this old girl off in order to share some tutorials with you.
My first is for this Siren's Song Necklace I made 2 years ago. It took me a whole month to make the beads and components and about a week to put the piece together.


I ended up sending this one to Stampington and they published it in an issue of Belle Armoire Jewelry.  It took a couple years to get to publication, but it was worth it.


This post has the basics from the article, but no step-by-step photos.  I won't be able to take a month to remake them and take pictures so you'll just have to let your own imagination fill in the missing blanks.


What you will need:

Supplies
Scissors
2 pieces of Plexiglas
Waxed Linen Cord
RIT Dye-Purple, Aquamarine, Navy Blue, Green
Alcohol
Plastic containers with lids
Slotted Spoons
Micro beads
Sand

Varathane Clear Gloss Water-Based Interior Polyurethane

Metallic Lustres by Deco Art (all colors)
Bamboo Skewers
Floral foam
Small alphabet rubber stamps
Sculpey Mold Maker
Seashells, sand dollars, starfish
Ocean themed pendants
Premo Sculpey Clay in White PE02 5001
Premo Sculpey Clay in Cobalt Blue, Green
Stampers
Texture tools
Spray bottle of water
Baby wipes
Sculpey Clay Conditioning machine
Sculpey Etch-n-pearl
Steel Rebar Wire
Heavy Duty Side Cutters
Needle Nose Pliers
Sculpey Super Slicer
Vinyl gloves
Silk Strips
19 gauge black steel wire
Hammer
Bench Block


Step-by-step instructions

Making the beads:

·         For beads, condition the white clay, then pinch off a piece of clay and roll it into a ball. Then poke a hole through the center of the bead.  Repeat from the other side of the bead. Add texture or words.

·         For the quote pendants, roll a ball of conditioned clay about the size of a golf ball.  Flatten with fingers and press the clay between two pieces of Plexiglas that have been misted with water to your desired thickness. Stamp desired design into disk.   Poke holes in the pendant.

·         For Disk Beads, roll clay into a ball and flatten between fingers.  Poke a hole in the bead.  Leave on the skewer and roll over textured surface or roll into micro beads.

·         For unique beads and focals, use Sculpey Mold Maker to make your own molds from seashells, pendants, and starfish. Then use the molds to make your own unique beads and focals.  Roll clay into a ball and press mold onto the ball.  Either use the skewer to make a hole through the whole bead or add a piece of wire bent into a U shape for a bail.

Following manufacturer’s directions, bake the beads in toaster oven. Keep in mind that thicker beads will require more bake time than thin beads.


Finishing the beads:

·         Once the beads are baked and cool, make dyes by adding about 2 tablespoons of liquid dye to about one cup of alcohol.  Mix thoroughly.  Add white beads and focals to the dye bath.  When you have achieved the look you want, remove from the dye bath with a slotted spoon.  Rinse with cool water until it runs clear.  Spread out on trays or paper plates to dry.

·         Use DecoArt’s Metallic Lustres waxes to add color to beads.  Layer multiple colors over beads and pendants using your fingers.  Once dry, buff with a soft cloth.
·         Seal beads with Varathane.  I place my beads on a bamboo skewer and dip them into a small jar with the sealer.  Then I set each skewer in a board that my husband drilled with holes.

·         For the beads with micro beads and sand, I dipped the bead in Varathane and then dipped it into a small container of sand or micro beads.  For some, I mixed the micro beads right into a small amount of sealer and then rolled the bead in the mixture.  I also dipped some beads into the Varathane and then sprinkled the beads with micro beads all over.


Making Clasps:


·         Make a necklace clasp with needle nose pliers and a piece of wire. Curl end around needle nose pliers to make a small loop.  Turn over so loop is on top of the pliers and bend around to make a hook.  Grasp end of wire with needle nose pliers and curl up into a loop.  Harden wire by pounding it with a hammer several times on each side. Make heart loop for clasp by cutting a piece of rebar wire about 3 inches long. Bend in the middle and pull the ends so they make a loop at the bottom.  Use pliers to bend tops of the heart. Harden wire.


To Make the Necklace

*For the necklace back, use 4 silk strips and loosely braid 3, adding and dropping a strip in an organic way repeatedly.  Add wire clasp and loops to ends so each necklace strand can be added. If the piece is too long, you can shorten it by knotting it in the middle.

* Build your collar by creating each necklace strand on waxed linen cord or silk strips.  Add them to the necklace as you work to check lengths and placement


Of course you can use these techniques to make your own  earrings, bracelets, rings etc...  This is just a starting point for your own fabulous creations.  Please feel free to comment with a link of your own goodies.  I'd love to see what you come up with.


If you are reading this, I'd love if you took a moment to comment so I know you are still out there...


 Thanks for stopping by....

Monday, February 27, 2017

My first Facebook Sale

I am a maker.  I am great at creating. I make things all the time. 

 What I am not so great at anymore is selling.  I used to do craft shows for 4-5 weekends straight in the fall.  I would work all spring and summer to make my stock and then also frantically work in the fall to make more of what was selling.  This process was good.  I learned a ton about production and practiced many skills.  Then there came a shift.  Most of it was caused by forces I had no control over.  I had to focus on some other things.  And through it, I was still creating, but not large quantities of things.  Single pieces or a series of pieces but not 20-50 of an item. And I narrowed down my shows to only one. I still love that show but the things I am making now are not selling there as much.  And I still have a lot of things.  So I reached out to a Facebook friend that seems to be really good at the selling.  She is helping me through my first Facebook sale.  It is tonight starting at 7pm EST.  Here is a peek at some of the things I will be offering...


There will be a mix of bracelets, necklaces, earrings and components for sale. Some of the pieces were ones that have been in Stampington magazines.

If you are interested, please request to join the group: 


It is only a 24 hour show and I will be listing the pieces tonight starting at 7pm.  Orders will be paid thru Paypal.

I  am even throwing in a couple free pieces here and there...

Hope to see you there...


Thanks for stopping by....

Thursday, September 29, 2016

Art Jewelry Elements: Tree Challenge

I am a huge fan of all the Talent gathered over at Art Jewelry Elements.

I am talking Talent with a capital T.

They generally offer a challenge each month and invite others to play along.  

I have on occasion and am doing so again this month.

The challenge this month is trees.

Well, I knew this would be the perfect challenge for me.

A while back I made a tree stamp from polymer clay.


And here are the new, naked beads.


It is one of my all time favorite stamps to use.

I love how the beads and components look.

So I knew I could use some of those for this challenge.

So here you go....

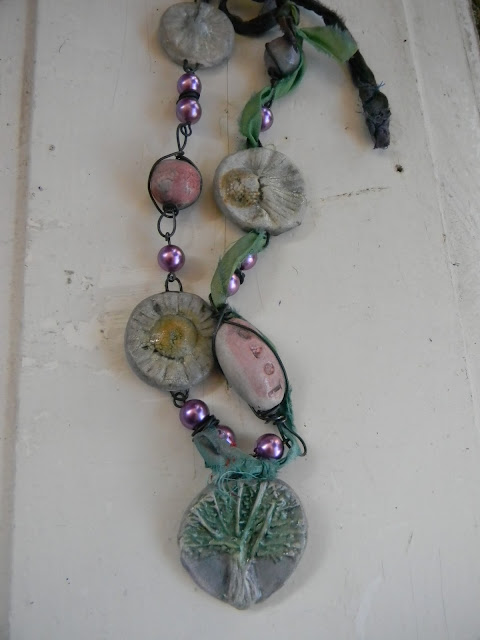
A Fairy Tale Forest necklace...


Here is one of those tree beads all dressed up...


And a little woodland fox too...


The key focal and magic bead are just what this necklace needs.


But then I had to make a fairy forest too.

   Flowers say fairy to me.

So I added some polymer beads and flower focals made from real flowers.


And last but not least, this little tree has a bee friend and a vintage inspired focal.


Join the team for more tree-inspired goodness:

Jennifer Stout Cameron

Lesley Watt

Jenny Davies-Reazor

Laney Mead

Niky Sayors

Cooky Schock

Cathy Spivey Mendola

Caroline Dewison

And the other guests:

Karin Grosset Grange

Merja Sundstrom

Cindy Martin Shaw

Allison L Norfleet Bruenger

Melissa Trudinger

Kathy Lindemer

Gloria Allen

Shai Williams

Tammy Adams

Mona Arnott

Terry Del Signore

Thanks for stopping by....

Wednesday, September 21, 2016

Workbench Wednesday...Getting Ready For An Art Abandonment...

It has been some time since I showed you what was on the workbench.

It seems something always is...I just don't always take a picture.

Here is what is going on this week...


These charms and beads are on their way to becoming something extra special...


The beads will be turned into bracelets that will be given as gifts...


There are some people I need to thank and art seems like the natural way for me to do it...


Each bracelet will have a hope bead as well as a few others...


I want to make enough that each person can choose the one they like best...


Of course the beads will have to be dyed...


I am thinking pink, blue, purple....


And then I made a pile of these little charms and beads.

My plan is to do a couple different bracelet designs...


And the charms???

Well, they have a special purpose...


They are destined to be a part of my next art abandonment...

What is that, you ask?

Well, there is a movement in art where artists take the things they make and leave them for others to find and take.


All these little charms will be sprinkled about next week in a place where I know they are needed....


The funny part of this story is that after taking these photos, I took the tray of pieces into my garage where I was going to color them....

The whole try flipped over and the beads and pendants scattered down into a huge pile of paint cans and such next to the sink.

Sigh.

I gathered the ones I could see, but I will be making more soon....

Oh my...

Thanks for stopping by....

Tuesday, August 30, 2016

Artisan Headpin Challenge

I am a huge fan of  Art Jewelry Elements.

It is a bonus to have so many talented artists all sharing in one place.

It is one of the few blogs I subscribe to and always read.

When they suggested an art headpin challenge, I was intrigued and emailed right away to sign up.

Just one problem....

I did not actually own any art headpins.

Which leaves me 2 options: buy some or make some.

Well, I am a making kind of girl.

So here is what I came up with this weekend.


Well that is just the first half of the story.

Want to see some of the designs I came up with using those headpins?

Ok, here they are....


Which is your favorite?


Leave a comment below for a chance to win this pair.


Just tell me your favorite pair shown and your email address so I can get in touch with you if you win.  

I will choose and announce a winner September 17th.

This is a long contest...

Tell all your friends

And good luck.

Want to see more fabulous art headpins?

Visit each of these blogs for more fabulousness.


Guests:


AJE Team Members:


Thanks for stopping by and don't forget to leave a comment with your favorite pair from this post and your email before September 17th for a chance to win....