Pages

Monday, June 29, 2015

Making your Own Polymer Clay Stamps/Molds

One of my favorite recent projects was polymer clay related.

While I was playing with the silicone molds, I made some molds and stamps with my own designs.

First I made a small sketch of what I wanted for the design with pencil.


Next I rolled out a little slab of clay.  
I laid the design down on the clay and burnished it with a ball tool to transfer the design to the clay.

Then I used my clay tools to  trace and make the design.

I decided not to add the word to this one.

Doing it backwards on the design would make it backwards once stamped.

Bake your mold in your toaster oven according to the manufacturer's directions.


Then I began stamping away.


You can use your stamp over and over again.

You will notice, however that the stamp starts to soften a bit as the mold absorbs some of the oil from the clay.

No worries.

Just pop the mold back in the oven with your next batch of beads and you are good as new.


My daughter wanted me to make her a thresher shark.

So my husband found an outline online. 

 I could not shrink it enough with my computer so I had to make my own sketch from it.  

You can see my erased first attempts.


I followed the same process for transferring the design and tracing the shape.


My daughter has not seen these yet but I like the way they turned out.


I hope she does too.


Next I wanted to play with just different textures.


It is not my favorite, but I do like the idea.


I can utilize different parts of the mold depending on where I press the clay on it.


I saved my two favorites for last.

I did a tree.

I love how they symbolize life and family.


I intentionally tapered the edges of the mold down towards the table.

Check these out!

How cool are they?


I made a ton of beads and pendants from the tree mold.


I ended up making bigger ones for pendants and smaller ones for possible earrings.


My favorite mold was actually the first one I made: a nest.

Also a symbol of family, birth and renewal.


There is something so satisfying to seeing designs come from something that came originally from your own head and hands.


I could not get enough of playing with this mold.

Big chunky pendants...

In a variety of shapes.


Some pieces that I gently curled up to be three dimensional nests.


Some with bails...


Some just the eggs....


I can't wait to start playing with the finishes.

Thanks for stopping by....


Saturday, June 27, 2015

Blue Boho Polymer Star Earrings

It feels like it has been a while since I shared some rustic polymer clay pieces.
So here are these sweet little boho star earrings.


They combine three of my favorite elements: silk, rustic polymer, and steel wire.


The silk softens the whole piece.


I would wear these...


Would you?

Thanks for stopping by....

Thursday, June 25, 2015

Thrifty Thursday: Chemistry Finds at Lucketts

I know some bloggers show you everything they got all at one time.  

I tend not to do that.

I don't go thrifting every week.

And I like to savor my finds.

When we went to Lucketts this spring, my daughter came and got me from one booth to show me "some cool chemistry stuff".

We found all sorts of goodies.

I am just going to show you what I chose.

My daughter got a bunch of cool chemistry stuff herself.  

She also told the seller what the pieces she had left were used for and how they went together.

I got all the glass test tubes she had.


I have never seen ones with caps.

Some had plastic and some had metal.


Very, very cool....


I also got these tiny glass bottles.

They are destined to become little reliquaries and vials filled with treasures.


And last but not least, check out these tiny little bottles.

So much possibility...


Thanks for stopping by....

Wednesday, June 24, 2015

Workbench Wednesday: Silicone Molds and Polymer Flower Pieces

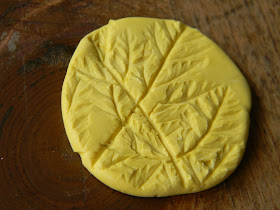
A couple weeks ago, I showed you my workbench with some silicone molds I made using fresh flowers and plants from the yard.

You can see it here if you like.

I wanted to share today how I have started to use them.

I tried to show you the mold with the polymer pieces made from each mold.


The funny thing about the process is that sometimes I think the mold turned out great or not so great.

Then when the clay is molded in them, I may completely change my mind.

For example, the one below has more detail than I originally thought.


This first batch of pieces has a variety of purposes.

The double-holed pieces are intended to be bracelet disks.


This next mold was made from clover...weeds.

But I love the way they turned out.

I made pendants and little clover beads...


More weeds....

Aren't they lovely?


The next mold I was meh about.


Once I saw the molded pieces, I was in love.


How cool are these?


It is fun to see how you can change the design by changing where you push your clay on the mold.


I like to add bails to some.


The next mold I made with lavender...a favorite of mine.


I love the way the mold turned out.

Once I actually molded the clay, it did not have as much definition as I originally thought.

I made some lavender chips or petals.


I also rolled some to make beads.


They look completely different depending on how thick you roll out the clay before molding.


These are going to be so much fun to paint and color and finish.


I also made some lavender pendants.


This mold looks promising...


What a delightful little meadow of wildflowers.


I love disks with holes in the centers for bracelets.


I varied the size of some of the holes.


I used yarrow for this mold.


The detail in the molded pieces is remarkable.


I love deep definition...


Lots of variety just from one mold.


I made some more of those chips/petals...


Even just the foliage from plants can be lacy and lovely.


More thin petals...


Last but not least, these pendants.


Next steps: color and finishes.

I'll show you how they look when they are done.

Until then, thanks for stopping by....